From Sketch to Stitch: How a Crochelly Piece Is Born
Follow a Crochelly merino cardigan from its first sketch through swatching, construction, finishing, inspection, and packaging.
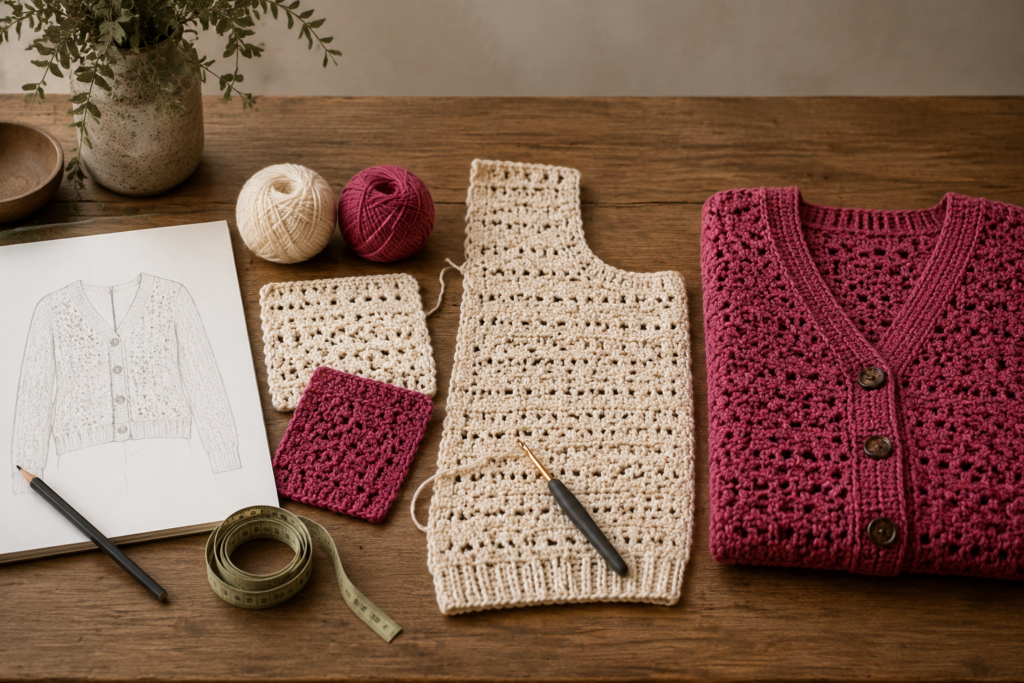
The finished piece you see in the shop — clean edges, even stitches, precise dimensions, natural fibres — looks deceptively simple. As though it arrived fully formed. In reality, every Crochelly piece travels through a series of distinct stages before it reaches that point, and each stage involves decisions and work that are invisible in the final product.
In this post, we follow one piece — a classic merino cardigan — from its first appearance as an idea through to the moment it is packaged and ready to ship. Every stage, every decision, nothing skipped.
The Complete Making Journey
Concept and Inspiration
Where the piece exists only as a feeling or an image
1–3 Days
Every piece starts not with a sketch but with a feeling. An image of how something should look in the world — draped over a chair, worn on a long walk, folded at the foot of a bed. Before any technical decisions are made, the feeling of the piece needs to be clear.
For the cardigan that becomes our case study here, the feeling was: a garment that feels like being held. Warm without being heavy. Beautiful without being complicated. Something you would reach for without thinking.
This stage involves looking — at nature, at architecture, at the way light falls on a surface. It involves collecting references: photographs, fabric samples, textures. It involves a lot of sitting with an idea until it clarifies itself.
What Happens Here
- Mood board development
- Reference collecting
- Initial silhouette ideas
- Feeling and aesthetic definition
Questions Being Asked
- Who is this piece for?
- What should it feel like to wear?
- What season, what occasion?
- What already exists, and how is this different?
Design and Technical Planning
Translating a feeling into a precise technical specification
2–5 Days
This is where the feeling meets mathematics. A garment design requires precise specifications — stitch counts, shaping calculations, size grading, construction sequence. Every design decision has a technical consequence, and both need to be resolved before the making begins.
The cardigan’s silhouette is sketched on graph paper first — front, back, sleeve — with key measurements noted for each size. Then the construction sequence is planned: will pieces be worked flat and seamed, or worked in the round? Where will increases and decreases fall? How will the neckline be shaped?
What Gets Designed
- Silhouette and proportions
- Stitch pattern selection
- Construction method
- Shaping placement and rate
- Size grading across all sizes
Technical Documents Created
- Schematic with all measurements
- Stitch count calculations
- Row-by-row shaping plan
- Materials estimate per size
Yarn Selection and Gauge Swatching
Finding exactly the right material and confirming all measurements
3–7 Days
Yarn selection is not a single decision — it is a process of elimination. The feeling of the piece determines the fibre type. The weight of the design determines the yarn weight. The production requirement determines the quantity available. Sometimes the yarn that is theoretically perfect is not available in sufficient quantity, or does not behave the way the design requires, and the selection process starts again.
For this cardigan, the choice was a 100% merino in a 4-ply weight — soft enough for constant skin contact, warm enough for autumn through spring, with enough drape to create the fluid silhouette the design required.
Then comes the swatching — and this step cannot be compressed regardless of how confident the yarn choice feels. Multiple swatches in different hook sizes. Each one washed and blocked before measuring. Each one compared to the design specification. The swatch that matches the design gauge determines the hook size for the entire project.
Yarn Selection Criteria
- Fibre content and quality
- Weight and drape behaviour
- Availability in required quantity
- Colour fastness (tested)
- Washability for the intended use
Swatching Process
- Minimum 3 swatches per yarn
- Each swatch fully washed and blocked
- Measured dry, at multiple points
- Final hook size confirmed before proceeding
The Making
Stitch by stitch — the longest and most meditative stage
12–20 Hours
With yarn chosen, gauge confirmed, and pattern finalised, the making begins. For a cardigan, this means working each piece separately — back body, left front, right front, two sleeves — and then seaming them together before finishing the edges.
Each piece is made to the precise stitch counts from the pattern. Stitch markers track shaping points. The stitch count at the end of every row is compared to the pattern. Any discrepancy is found and corrected immediately — never carried forward in the hope it will resolve itself. It will not.
The making stage for a medium-sized cardigan in worsted weight typically takes between 15 and 20 hours of actual crochet time — spread across several studio days. This is the stage most visible to the outside world, and the one that requires the most sustained focus.
During Making
- Stitch count checked every row
- Markers placed at all shaping points
- Errors corrected immediately on discovery
- Tension maintained consciously throughout
Pieces Made Separately
- Back body — largest piece
- Left front body
- Right front body
- Left and right sleeves
Blocking Each Piece
Shaping every component to exact dimensions before assembly
24–36 Hours (Drying)
Before a single seam is joined, every piece is blocked individually to the measurements specified in the schematic. This is the step that ensures every component will fit together correctly — that seams will align, that the finished garment will have the correct dimensions, and that the stitch work will appear even and professional.
Each piece is soaked, pressed in towels, pinned to the foam mats at every key measurement point, and left to dry completely. For the cardigan, this means five separate blocking sessions across two days — the back, the two fronts, and the two sleeves all need to dry fully before seaming can begin.
Blocked in Sequence
- Back body first — establishes reference dimensions
- Both fronts — mirrored and measured against the back
- Sleeves — matched in length and width
- Each piece fully dry before next step
What Blocking Fixes
- Curling edges that will not seam flat
- Slight stitch inconsistencies
- Minor dimensional discrepancies
- The overall drape and hand of the fabric
Seaming, Edging, and Final Finishing
Joining the pieces and completing every detail
2–4 Hours
With all pieces blocked and dry, the seaming begins. Shoulder seams first, then side seams, then sleeves set into the armholes. Each seam is worked using a yarn needle and the mattress stitch method — invisible from the right side, flat and strong on the wrong side.
Then the edging: a neat, consistent border worked around the entire front opening and neckline of the cardigan. Buttonholes are placed and worked if the design includes them. Every seam is steam-blocked flat after joining. Every yarn end is woven in with a needle in both directions. The completed garment gets a final inspection under good light — every seam, every edge, every colour transition.
Seaming Order
- Shoulder seams — foundation of the garment
- Side seams — body is joined
- Sleeve seams — sleeves prepared
- Sleeves set in — garment complete
Final Checks
- All seams lie completely flat
- All yarn ends woven in securely
- Edging is even and consistent
- Overall dimensions match schematic
Photography, Listing, and Packaging
Preparing the finished piece for the world
2–3 Hours
The finished cardigan is photographed in natural light — on a dress form, flat on a clean surface, and in detail shots that show the stitch texture and finishing quality. The listing is written with complete information: exact measurements, fibre content, care instructions, and the story of how it was made.
When it sells, it is packaged with care — tissue paper, a handwritten note, printed care instructions, and outer packaging that protects the piece in transit. The same attention given to making it is given to sending it out into the world.
Photography Checklist
- Full front view on form
- Back view showing construction
- Detail shot of stitch pattern
- Detail shot of finishing and edges
- Flat lay showing full dimensions
Packaging Contents
- Tissue-wrapped piece
- Printed care instruction card
- Handwritten personal note
- Protective outer packaging
What This Process Means for You
When you hold a Crochelly cardigan, you are holding the result of every stage described above. The weeks of design work. The swatching and the calculations. The 15 to 20 hours of making. The blocking, the seaming, the finishing, the inspection.
None of that is visible in the finished piece. That invisibility is intentional — a well-made garment should look effortless. But knowing what went into it changes how you hold it, how you care for it, and how long you keep it.
That knowledge is part of the value. And sharing it openly is part of who we are.