How to Crochet a Cardigan That Actually Fits: Full Pattern & Sizing Guide
Make a beautifully fitted crochet cardigan with this complete guide to yarn, ease, measurements, shaping, assembly, blocking, and sizes XS through 5XL.
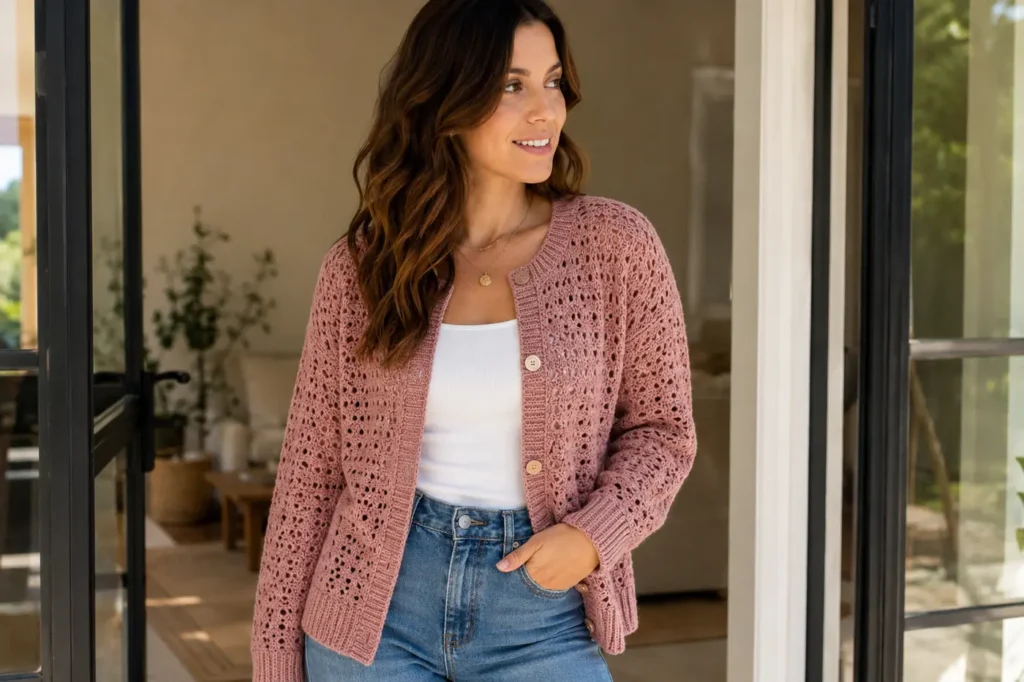
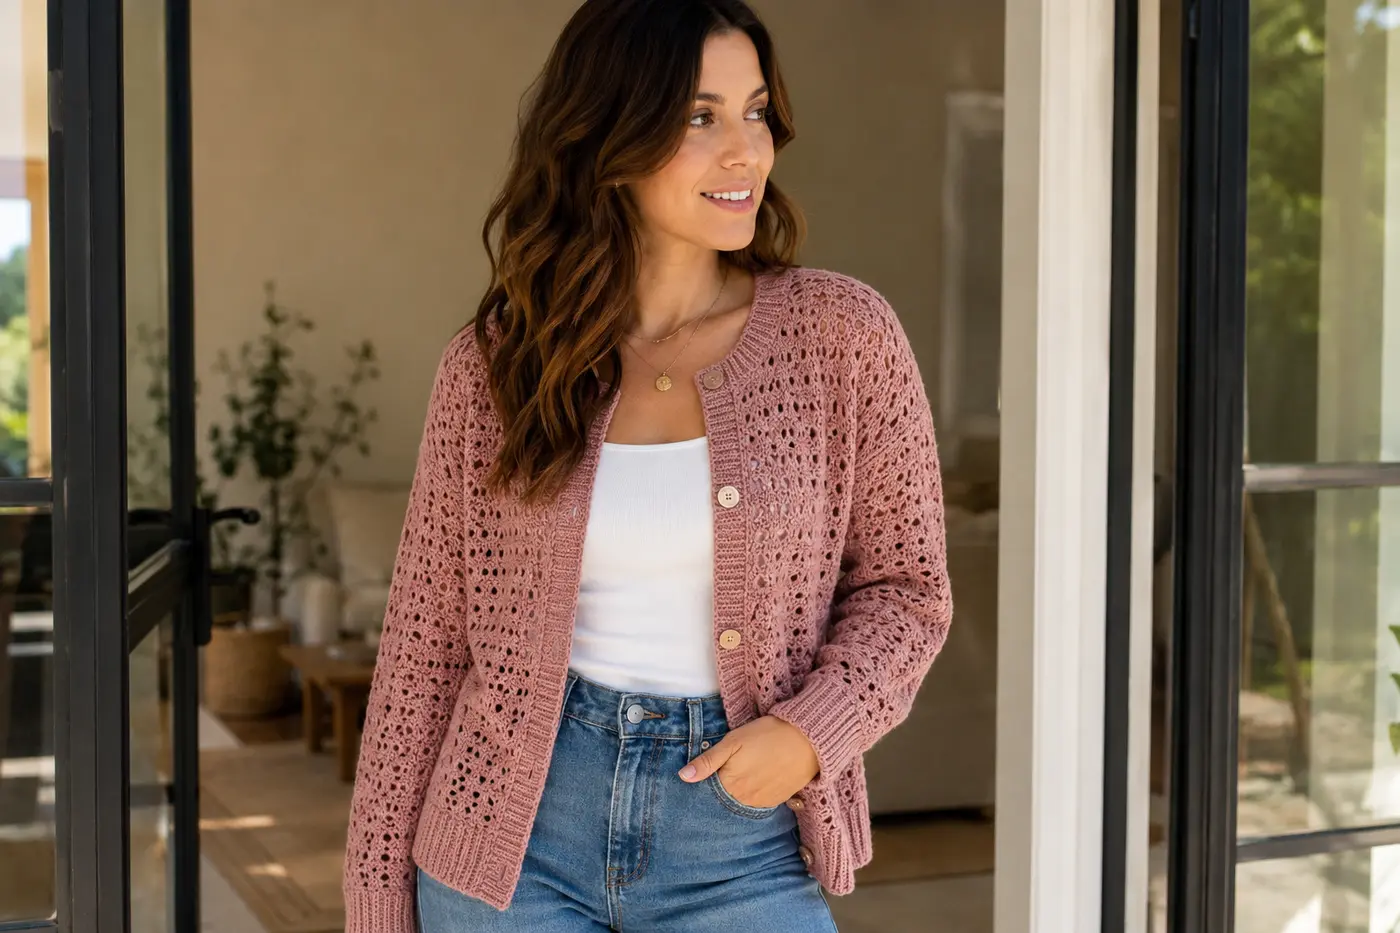
The Crochet Garment Revolution: Why 2026 Is the Year of the Handmade Cardigan
Let’s address the elephant in the room: for decades, “crocheted clothing” conjured images of stiff, boxy, unflattering garments that belonged more in a craft fair time capsule than in anyone’s actual wardrobe. But in 2026, we’re living through a genuine revolution in crochet wearables — and the crochet cardigan is leading the charge.
Several converging trends have created the perfect storm for handmade crochet garments:
- The “anti-fast-fashion” movement has gone mainstream. Consumers — particularly Gen Z and Millennials — are actively seeking handmade, slow-crafted alternatives to mass-produced clothing. Interest in handmade cardigan patterns has grown steadily in recent years.
- Advanced yarn technology has produced fibers that drape, breathe, and wear like commercial knitwear. Today’s cotton-bamboo, Tencel, and recycled fiber blends are lightyears ahead of the scratchy, stiff yarns of the past.
- Social media pattern designers have raised the bar dramatically. Indie designers on Ravelry, Etsy, and Patreon are creating crochet garment patterns with the fit precision and style sensibility of professional fashion design.
- The mental health crafting movement continues to grow. The meditative, phone-free nature of crocheting a wearable garment over several weeks offers a meaningful counterpoint to the anxiety-inducing pace of digital life in 2026.
In this comprehensive guide, I’m going to walk you through creating a crochet cardigan that looks good — like, wear-it-to-brunch-and-get-compliments good. We’ll cover everything from choosing the right yarn and understanding ease, to a full written pattern in sizes XS through 5XL, to finishing techniques that separate amateur-looking garments from professional-quality pieces.
Grab your hooks. This is going to be a thorough one.
Part 1: Understanding Fit — Why Most Crochet Cardigans Fail (And How to Fix It)
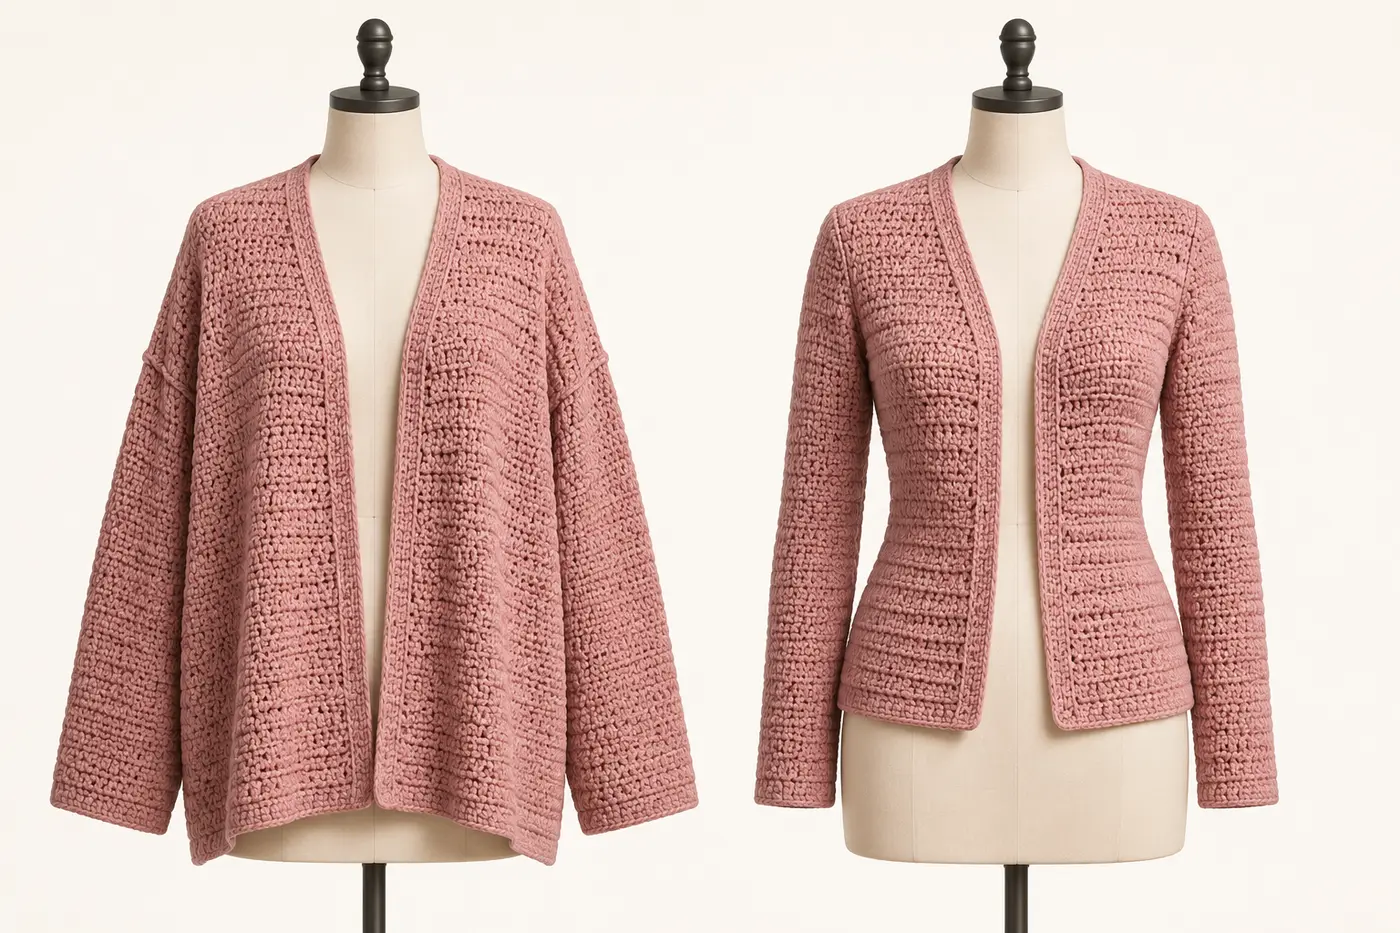
Before we touch a single skein of yarn, we need to talk about why so many crochet cardigans end up unworn at the back of the closet. Understanding these common pitfalls will transform your approach to garment crochet.
Problem #1: Ignoring Ease
Ease is the difference between your body measurements and the finished garment measurements. It’s arguably the single most important concept in garment construction, and it’s where most crochet patterns (and crocheters) go wrong.
There are three types of ease:
- Negative ease: The garment is smaller than your body measurements. It stretches to fit. Think: fitted tops, bodycon styles. Crochet fabric rarely works well with negative ease because most crochet stitches don’t have the elasticity of knit fabric.
- Zero ease: The garment matches your body measurements exactly. This can work for crochet, but leaves no room for comfortable movement.
- Positive ease: The garment is larger than your body measurements. This is where crochet garments shine. For a cardigan, 2-4 inches of positive ease at the bust is the sweet spot — enough room for comfortable layering without looking oversized.
The pattern in this guide is designed with 3 inches of positive ease at the bust for a relaxed, modern fit that flatters without being baggy.
Problem #2: Wrong Yarn Choice
Here’s a hard truth: not every yarn is suitable for garments, no matter how beautiful it looks in the skein. For a cardigan that drapes properly and holds its shape over time, you need a yarn with specific characteristics:
| Characteristic | Why It Matters | Best Fibers |
|---|---|---|
| Drape | Allows the fabric to flow over curves rather than standing stiffly away from the body | Bamboo, Tencel, silk blends, mercerized cotton |
| Memory | The yarn returns to its shape after stretching — prevents the garment from “growing” with wear | Wool blends, cotton-acrylic blends, Tencel |
| Weight consistency | Even thickness throughout prevents lumpy, uneven fabric | Machine-spun yarns, plied (not single-ply) yarns |
| Softness | The garment will sit against your skin for hours — comfort is non-negotiable | Superwash merino, pima cotton, bamboo, Tencel |
My Top Yarn Recommendations for This Cardigan (2026 Picks)
- Drops Cotton Merino — A 50/50 cotton-merino blend that offers the drape of cotton with the memory and warmth of wool. Machine washable. Perfect for three-season wear. (~$4/50g ball)
- Hobbii Friends Cotton Silk — Cotton-silk blend with a gorgeous sheen and exceptional drape. One of the most popular garment yarns of 2025-2026. (~$3.50/50g ball)
- Scheepjes Whirl — If you want a gradient color-changing effect, this cotton-acrylic blend creates stunning ombré cardigans without manual color changes. (~$18/1000m cake)
- KnitPicks CotLin — Cotton-linen blend that’s crisp, breathable, and perfect for summer cardigans. Gets softer with every wash. (~$5/50g ball)
- Lion Brand Truboo — 100% rayon from bamboo. Silky, drapey, and incredibly soft. Available in beautiful muted tones. (~$6/100g skein)
Yarn to avoid for this pattern: 100% acrylic (too warm, pills easily, lacks drape), bulky or super bulky weight (too heavy, creates stiff fabric), loosely spun single-ply yarns (will pill and wear poorly), novelty/textured yarns (obscure stitch definition).
Problem #3: Skipping the Gauge Swatch
I know. You’ve heard this a million times. But I’m going to say it again because it’s that important for garments: MAKE A GAUGE SWATCH.
Not a tiny 2-inch square — a proper swatch of at least 6 inches × 6 inches. Wash and dry it exactly how you plan to care for the finished garment. Then measure. If your gauge is off by even half a stitch per inch, that compounds across 40+ inches of bust circumference into an error of 2+ inches. That’s the difference between “fits beautifully” and “I can’t even close this thing.”
For this pattern, the target gauge is:
16 stitches × 18 rows = 4 inches (10 cm) in half double crochet, using a 5.0mm (H/8) hook with DK weight yarn, after blocking.
If you’re getting fewer stitches per inch (your swatch is too big), go down a hook size. More stitches per inch (swatch too small), go up a hook size. Keep adjusting until you nail the gauge.
Problem #4: No Shaping
A rectangle is not a garment. The human body has curves — bust, waist, hips — and a well-fitting cardigan acknowledges and accommodates those curves through strategic increases and decreases. This pattern includes:
- Waist shaping (decreases from bust to natural waist, increases from waist to hip)
- Bust darts for sizes L and above (optional but recommended)
- Sleeve cap shaping for a smooth shoulder line
- Neckline shaping for a flattering V-neck
Part 2: Taking Your Measurements
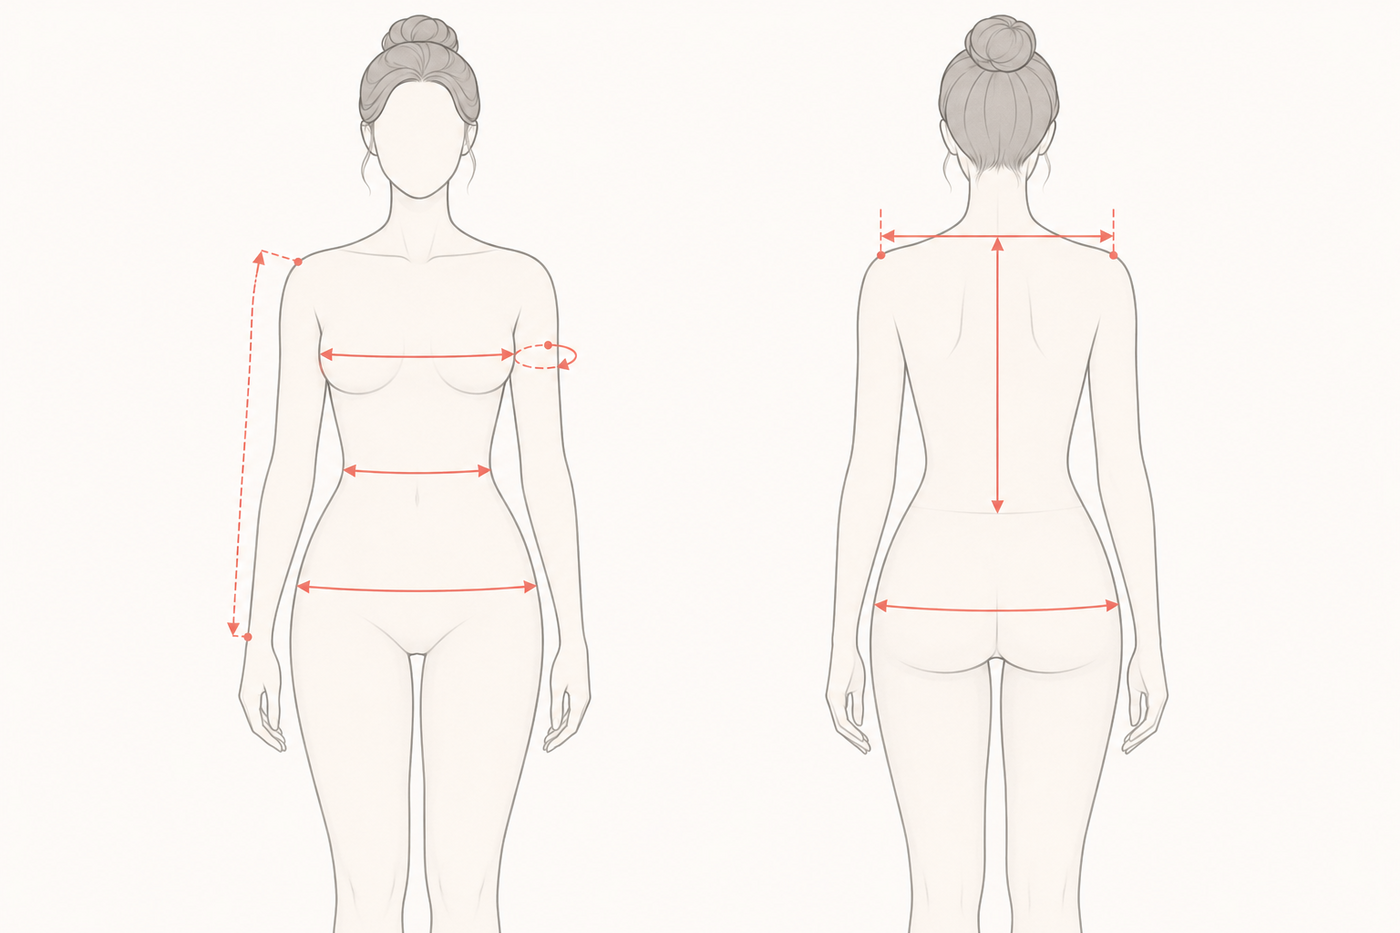
You’ll need the following measurements. Use a flexible measuring tape and measure over a well-fitting (not padded) bra and a single layer of clothing:
- Bust: Around the fullest part of the bust, keeping the tape straight across the back.
- Waist: Around the natural waistline (bend to the side — the crease is your natural waist).
- Hip: Around the fullest part of the hip/seat, typically 7-9 inches below the natural waist.
- Shoulder width: From the edge of one shoulder to the other, measured across the back.
- Arm length: From shoulder edge to desired sleeve length (wrist for full-length, mid-forearm for 3/4 sleeves).
- Upper arm circumference: Around the fullest part of the upper arm, with the arm relaxed at your side.
- Back length: From the prominent bone at the back of the neck to the natural waist.
- Total desired length: From shoulder to where you want the hem to fall (typically mid-hip for a cardigan).
Size Chart for This Pattern
| Size | Bust | Waist | Hip | Finished Bust (with 3″ ease) |
|---|---|---|---|---|
| XS | 28-30″ | 24-26″ | 32-34″ | 33″ |
| S | 32-34″ | 28-30″ | 36-38″ | 37″ |
| M | 36-38″ | 32-34″ | 40-42″ | 41″ |
| L | 40-42″ | 36-38″ | 44-46″ | 45″ |
| XL | 44-46″ | 40-42″ | 48-50″ | 49″ |
| 2XL | 48-50″ | 44-46″ | 52-54″ | 53″ |
| 3XL | 52-54″ | 48-50″ | 56-58″ | 57″ |
| 4XL | 56-58″ | 52-54″ | 60-62″ | 61″ |
| 5XL | 60-62″ | 56-58″ | 64-66″ | 65″ |
Part 3: The Pattern — “Willow” Lace Cardigan
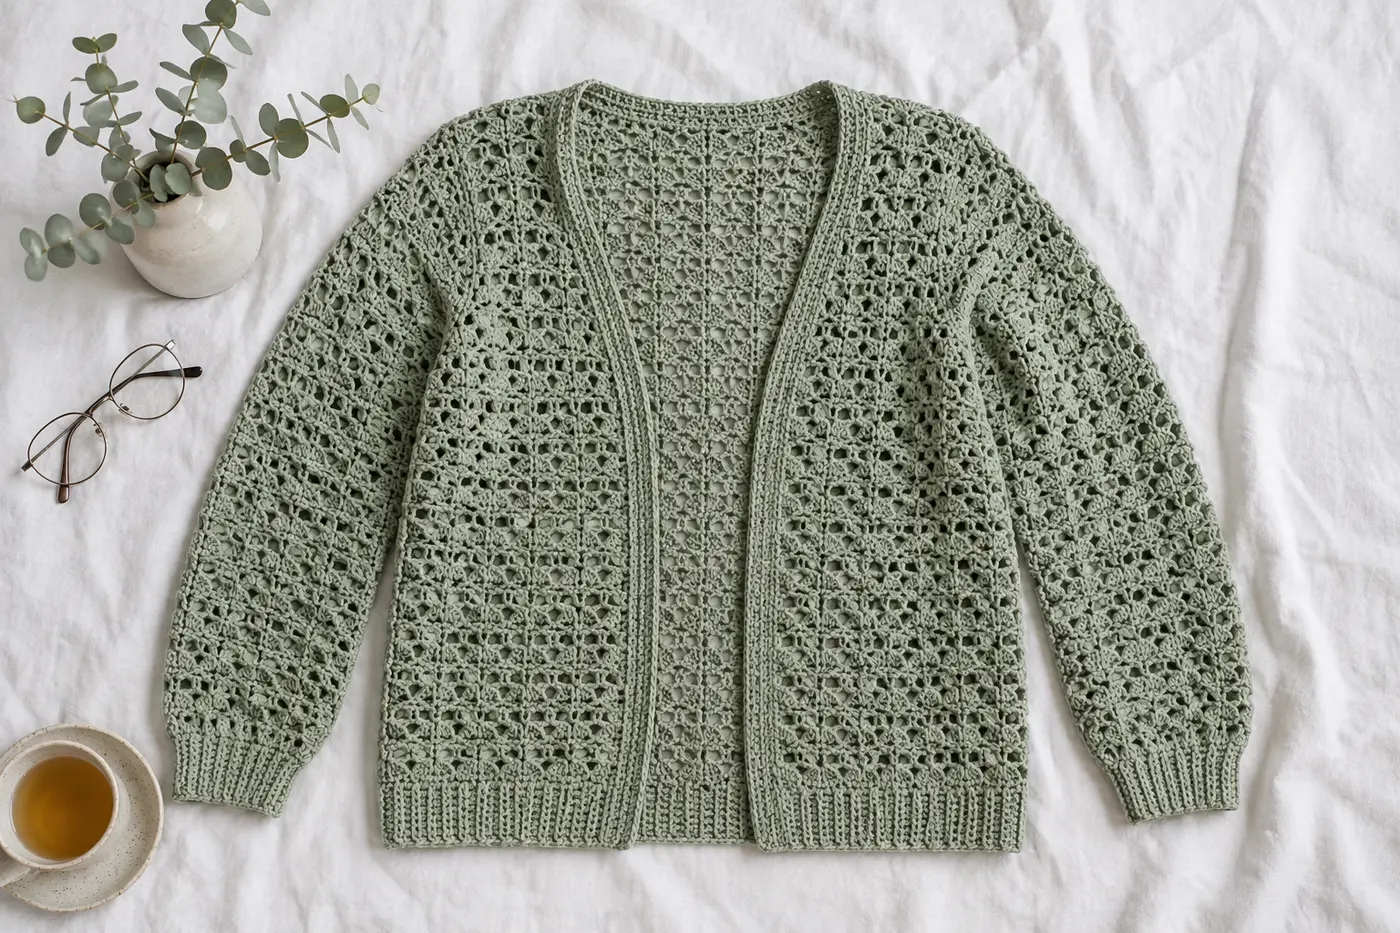
Pattern Overview
The “Willow” cardigan is constructed in pieces — two fronts, one back, and two sleeves — which are then seamed together. This construction method allows for precise sizing and shaping in each piece. The body features a beautiful V-stitch lace pattern that’s deceptively simple, while the cuffs, hem, and front bands are worked in a stretchy ribbed stitch for a polished, professional finish.
Skill Level
Confident intermediate. You should be comfortable with: half double crochet, double crochet, V-stitch, increasing, decreasing, working in rows, seaming, and reading a written pattern with multiple sizes.
Materials
- Yarn: DK weight cotton or cotton-blend yarn
- XS/S: 800-900 yards (7-8 skeins of 50g/115yd)
- M/L: 1000-1200 yards (9-11 skeins)
- XL/2XL: 1300-1500 yards (12-14 skeins)
- 3XL/4XL: 1600-1800 yards (14-16 skeins)
- 5XL: 1900-2100 yards (17-19 skeins)
- Hook: 5.0mm (H/8) — or size needed to obtain gauge
- Notions: Tapestry needle, stitch markers, row counter, measuring tape, rust-proof pins for blocking
Gauge
16 sts × 18 rows = 4″ (10cm) in half double crochet after blocking.
One V-stitch repeat (dc, ch1, dc) = approximately 1 inch wide.
Stitch Guide
V-stitch (V-st): (Dc, ch 1, dc) all in the same stitch or space.
Front Post Half Double Crochet (FPhdc): Yarn over, insert hook from front to back to front around the post of the indicated stitch in the previous row, yarn over and pull up a loop (3 loops on hook), yarn over and pull through all 3 loops.
Back Post Half Double Crochet (BPhdc): Yarn over, insert hook from back to front to back around the post of the indicated stitch in the previous row, yarn over and pull up a loop, yarn over and pull through all 3 loops.
Ribbing pattern: *FPhdc, BPhdc* repeat. This creates a stretchy, knit-like ribbed fabric that’s perfect for cuffs and hems.
Decrease (hdc2tog): Yarn over, insert hook in next st, pull up a loop, yarn over, insert hook in following st, pull up a loop (5 loops on hook), yarn over and pull through all 5 loops.
Pattern Notes
- Pattern is written for size XS, with sizes S (M, L, XL, 2XL, 3XL, 4XL, 5XL) in parentheses.
- When only one number is given, it applies to all sizes.
- Ch 2 at the beginning of hdc rows counts as first hdc throughout.
- Ch 3 at the beginning of dc rows counts as first dc throughout.
- All pieces are worked flat (back and forth in rows).
BACK PANEL
Ribbed Hem:
- Ch 12.
- Hdc in 3rd ch from hook and each ch across. (10 hdc) Turn.
- Ch 2, *FPhdc around next st, BPhdc around next st* across, hdc in top of turning ch. Turn.
- Repeat Row 3 until the ribbing strip measures 16.5 (18.5, 20.5, 22.5, 24.5, 26.5, 28.5, 30.5, 32.5) inches when slightly stretched — this should equal half the finished bust measurement. Do not fasten off.
Transition to Body:
- Rotate the ribbing strip 90 degrees. Working along the long edge, ch 2, work 66 (74, 82, 90, 98, 106, 114, 122, 130) hdc evenly across the edge. Turn. (Tip: This means working approximately 2 hdc for every 3 rows of ribbing. Place markers at regular intervals to ensure even spacing.)
V-Stitch Lace Body:
- Setup Row: Ch 3 (counts as dc), skip 1 st, *V-st in next st, skip 1 st* across, dc in top of turning ch. Turn. You should have 32 (36, 40, 44, 48, 52, 56, 60, 64) V-stitches plus 2 edge dc.
- Pattern Row: Ch 3, *V-st in ch-1 space of next V-st* across, dc in top of turning ch. Turn.
- Repeat Row 7 for the body of the back panel.
Waist Shaping (decreases):
Continue in V-st pattern. At the same time, on the following rows, decrease 1 stitch at each end:
- Work decrease rows on rows 8, 12, and 16 (counting from the transition row). To decrease at the beginning: Ch 3, skip the first V-st, V-st in next V-st, continue across. To decrease at the end: skip the last V-st before the edge dc, dc in turning ch. (6 V-stitches decreased total — 3 from each side)
You should now have 26 (30, 34, 38, 42, 46, 50, 54, 58) V-stitches.
Waist to Hip Shaping (increases):
- Work 2 rows even (no shaping).
- On the next row and every 4th row for 3 increase rows, add 1 V-st at each end: Ch 3, V-st in first st (increase made), continue across in pattern, V-st in last st before turning ch (increase made), dc in turning ch. (6 V-stitches added back)
You should be back to 32 (36, 40, 44, 48, 52, 56, 60, 64) V-stitches.
Continue even until the back panel measures 15 (15, 15.5, 15.5, 16, 16, 16.5, 16.5, 17) inches from the bottom of the ribbing.
Armhole Shaping:
- Sl st across 3 (3, 4, 4, 5, 5, 6, 6, 7) V-stitches at the beginning of the next row. Work in pattern across to the last 3 (3, 4, 4, 5, 5, 6, 6, 7) V-stitches. Turn, leaving remaining stitches unworked.
- Decrease 1 V-st at each end of the next 2 (2, 2, 3, 3, 3, 3, 4, 4) rows.
- Continue even on remaining 22 (26, 28, 30, 32, 36, 38, 40, 42) V-stitches until armhole measures 8 (8.5, 9, 9.5, 10, 10.5, 11, 11.5, 12) inches.
Shoulder Shaping:
- Work across 7 (8, 9, 9, 10, 11, 12, 12, 13) V-stitches. Fasten off. (This is the first shoulder.)
- Skip the center 8 (10, 10, 12, 12, 14, 14, 16, 16) V-stitches for the neck.
- Join yarn and work across the remaining 7 (8, 9, 9, 10, 11, 12, 12, 13) V-stitches for the second shoulder. Fasten off.
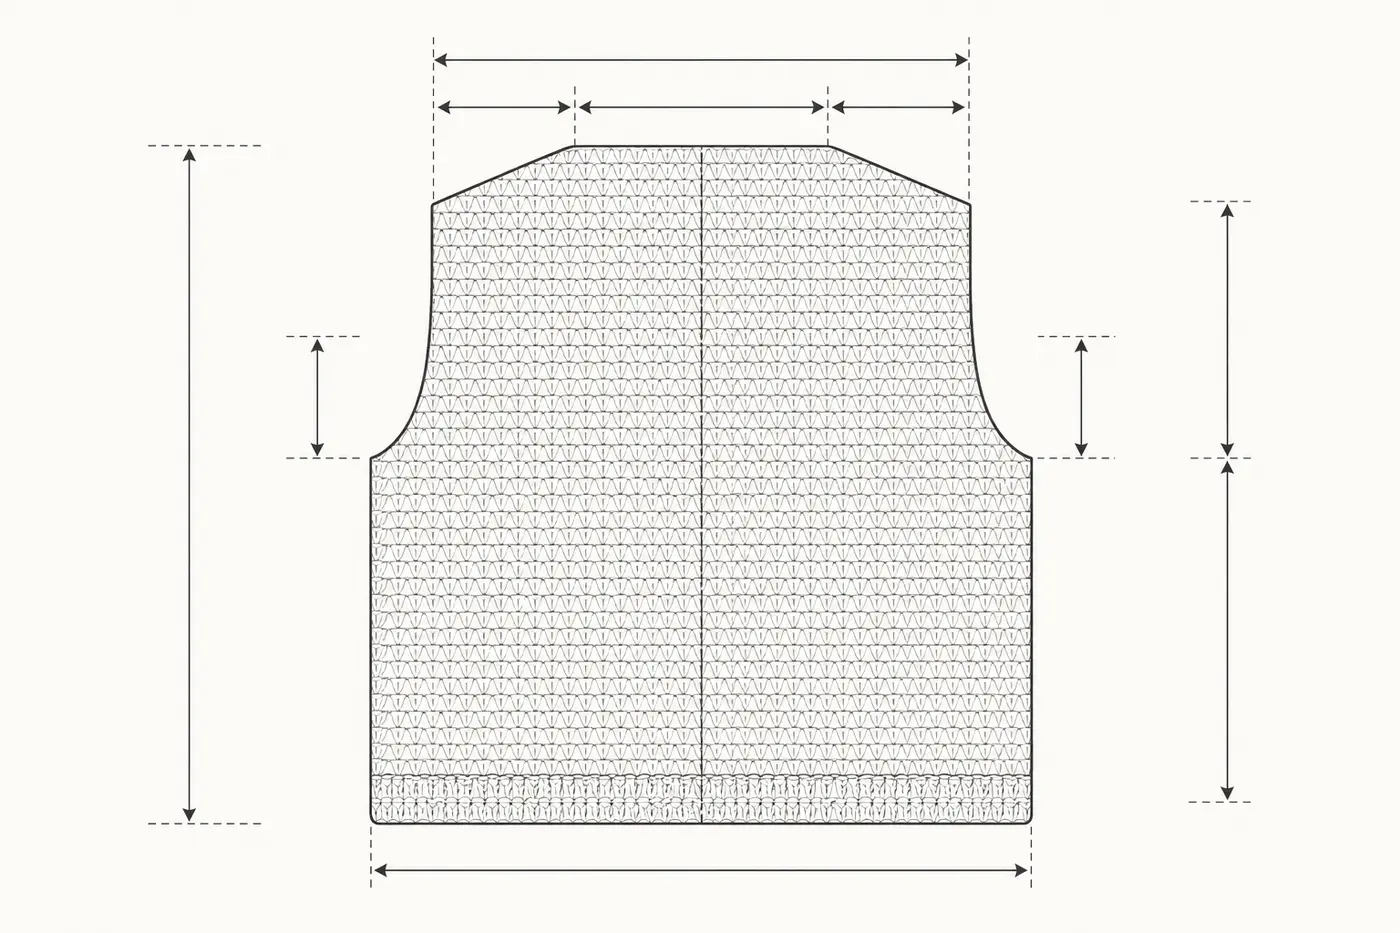
LEFT FRONT PANEL
Ribbed Hem:
Work as for back panel ribbing, but make the strip 8.25 (9.25, 10.25, 11.25, 12.25, 13.25, 14.25, 15.25, 16.25) inches long — one quarter of the finished bust measurement.
Transition to Body:
Rotate and pick up 33 (37, 41, 45, 49, 53, 57, 61, 65) hdc along the long edge.
V-Stitch Body:
Work as for back, establishing 16 (18, 20, 22, 24, 26, 28, 30, 32) V-stitches.
Waist Shaping:
Decrease at the side edge (end of RS rows) only — 3 decreases total on the same rows as the back panel. Keep the front edge (neckline side) straight.
V-Neck Shaping (begins simultaneously with waist-to-hip increases):
This is where the left front gets its V-neck shape. At the front edge (beginning of RS rows), decrease 1 V-st every 3rd row. Continue these neckline decreases throughout the remainder of the front until you have 7 (8, 9, 9, 10, 11, 12, 12, 13) V-stitches remaining for the shoulder — matching the back shoulder stitch count.
Armhole Shaping:
Shape the armhole at the side edge only, matching the back panel armhole shaping.
Continue working even (maintaining neckline decreases as needed) until the armhole measures the same as the back. Fasten off.
RIGHT FRONT PANEL
Work as for Left Front, reversing all shaping. Neckline decreases occur at the end of RS rows (instead of the beginning), and armhole shaping occurs at the beginning of RS rows.
SLEEVES (Make 2)
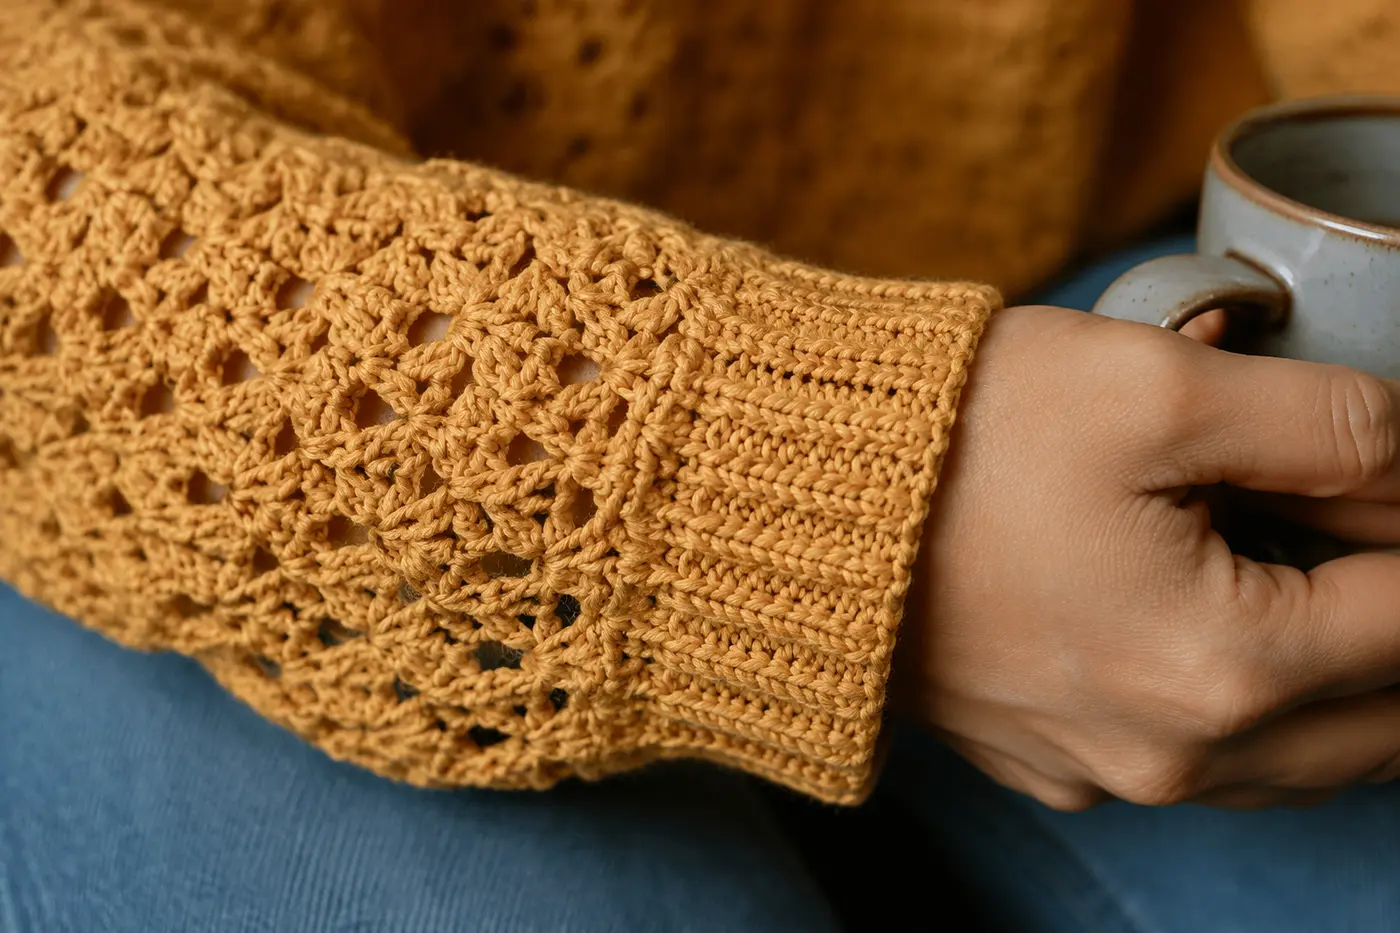
Ribbed Cuff:
- Ch 12 (same as body ribbing).
- Work FPhdc/BPhdc ribbing until the cuff strip measures 9 (9.5, 10, 11, 12, 13, 14, 15, 16) inches — equal to the wrist/lower arm circumference plus 1 inch of ease. Join the short ends with a sl st seam to form a tube, being careful not to twist.
Transition to Sleeve Body:
- Working along one long edge of the cuff tube, pick up 36 (38, 40, 44, 48, 52, 56, 60, 64) hdc evenly around. Place marker and continue working in the round.
V-Stitch Sleeve Body (worked in the round):
- Establish V-st pattern around: *V-st, skip 1* around. You should have 18 (19, 20, 22, 24, 26, 28, 30, 32) V-stitches.
- Work 3 rounds even.
- Increase round: V-st in first ch-1 space, V-st in the space between V-stitches (increase made), continue in pattern. Work 1 increase at the “underarm” position every 4th round until you have 24 (26, 28, 30, 34, 36, 38, 42, 44) V-stitches.
- Continue even until the sleeve measures 17 (17.5, 17.5, 18, 18, 18, 18.5, 18.5, 18.5) inches from the cuff, or desired length to underarm.
Sleeve Cap Shaping (now working flat — back and forth):
- Sl st across 3 (3, 4, 4, 5, 5, 6, 6, 7) V-stitches (matching the body armhole bind-off). Work across to the last 3 (3, 4, 4, 5, 5, 6, 6, 7) V-stitches. Turn.
- Decrease 1 V-st at each end of every row for 4 (5, 5, 5, 6, 6, 6, 7, 7) rows.
- Decrease 1 V-st at each end of every other row for 2 (2, 2, 3, 3, 4, 4, 5, 5) rows.
- Fasten off, leaving remaining 6 (6, 6, 6, 6, 6, 6, 6, 6) V-stitches at the top of the cap. (These will be seamed to the shoulder.)
ASSEMBLY
This is where patience pays off. Proper assembly transforms individual pieces into a cohesive garment.
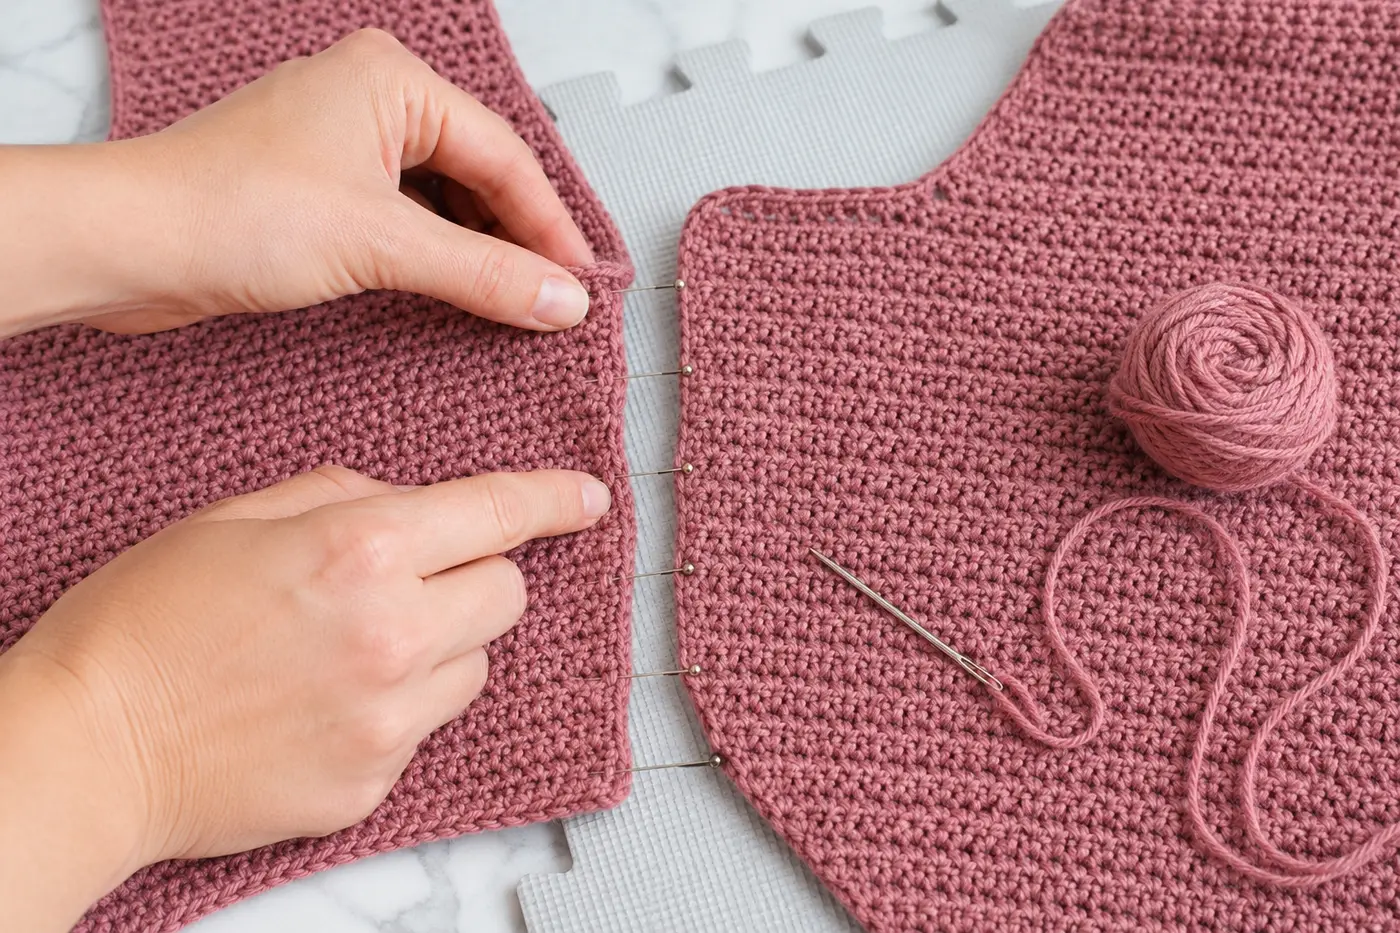
Step 1: Block All Pieces
Before seaming, wet block every piece. Pin them to your blocking mats according to the finished measurements for your size. Allow to dry completely. This step is NON-NEGOTIABLE for a professional-looking garment. Blocking evens out your stitches, relaxes the fabric, and allows you to gently stretch or compress pieces to their exact required dimensions.
Step 2: Seam the Shoulders
Place the back and front panels right sides together. Using a tapestry needle and matching yarn, seam the shoulders using mattress stitch or whip stitch. Mattress stitch creates an invisible seam and is strongly recommended for shoulder seams.
Step 3: Set In the Sleeves
This is the trickiest part. Pin the sleeve cap into the armhole, matching the center of the sleeve cap to the shoulder seam, and the underarm edges of the sleeve to the underarm edges of the body. Distribute any ease evenly around the cap. Seam using mattress stitch, working slowly and checking the fit as you go.
Step 4: Seam the Sides and Underarms
Starting at the underarm, seam down the side of the body from armhole to hem, then seam the sleeve from underarm to cuff. Use mattress stitch for the cleanest finish.
Step 5: Front Band and Neckline
This final element frames the entire cardigan and gives it a finished, professional look.
- With RS facing, join yarn at the bottom right front corner.
- Ch 1, work sc evenly up the right front edge, around the back neck, and down the left front edge. Aim for approximately 3 sc for every 4 rows along the fronts, and 1 sc in each stitch across the back neck. Turn.
- Ch 2, work FPhdc/BPhdc ribbing across the entire front band. Turn.
- Repeat for 4-6 rows of ribbing (approximately 1 inch).
- Fasten off. Weave in ends.
Optional: Button loops. On the 3rd row of the front band (for the right front if you’re right-handed, left front if left-handed), work buttonholes at desired intervals: *work in ribbing pattern to buttonhole position, ch 2, skip 2 sts*. On the following row, work 2 hdc into each ch-2 space. Sew buttons to the opposite front band to align with the buttonholes.
Part 4: Advanced Customizations
Adding Short Row Bust Darts (Recommended for Sizes L+)
Bust darts add extra length at the front of the garment to accommodate a fuller bust, preventing the hem from riding up in the front. Here’s how to add them to the front panels:
After completing the waist-to-hip increases and before beginning the armhole shaping, work short rows across the center of each front panel:
- Work across to the last 4 V-stitches. Turn (leaving the remaining stitches unworked).
- Work across to the last 4 V-stitches on the other end. Turn.
- Work across to the last 6 V-stitches. Turn.
- Work across to the last 6 V-stitches. Turn.
- Work across all stitches to even out the row. Turn.
- Work 1 full row across all stitches.
These short rows add approximately 1-1.5 inches of length to the center of the front panel where the bust fullness is. The “steps” created by turning will be barely visible in the lace pattern, and blocking will smooth them further.
Converting to a 3/4 Sleeve
Simply stop the sleeve 5-6 inches shorter than the full-length measurement and work the ribbed cuff at that point. Adjust the sleeve increase frequency — instead of increasing every 4th round, increase every 3rd round to ensure the sleeve reaches the correct upper arm circumference in fewer rounds.
Adding Pockets
Patch pockets are the easiest addition and surprisingly useful on a cardigan:
- Crochet two squares in the V-stitch pattern, approximately 5″ × 5″ (or desired size).
- Add 2-3 rows of ribbing across the top of each pocket.
- Block the pockets.
- Pin them to the front panels at hip height, centered on each panel.
- Whip stitch along the sides and bottom, leaving the ribbed top open.
Gradient/Ombré Color Effect
One of the hottest looks in crochet garments in 2026 is the gradient effect. You can achieve this by:
- Using gradient cake yarn (like Scheepjes Whirl) — the color changes happen automatically as you crochet.
- Manual color transitions: Use 4-5 shades of the same color, transitioning every 8-10 rows. For a seamless blend, work the transition row holding both old and new colors together (one strand of each), then drop the old color on the next row.
Part 5: Finishing Touches That Make All the Difference
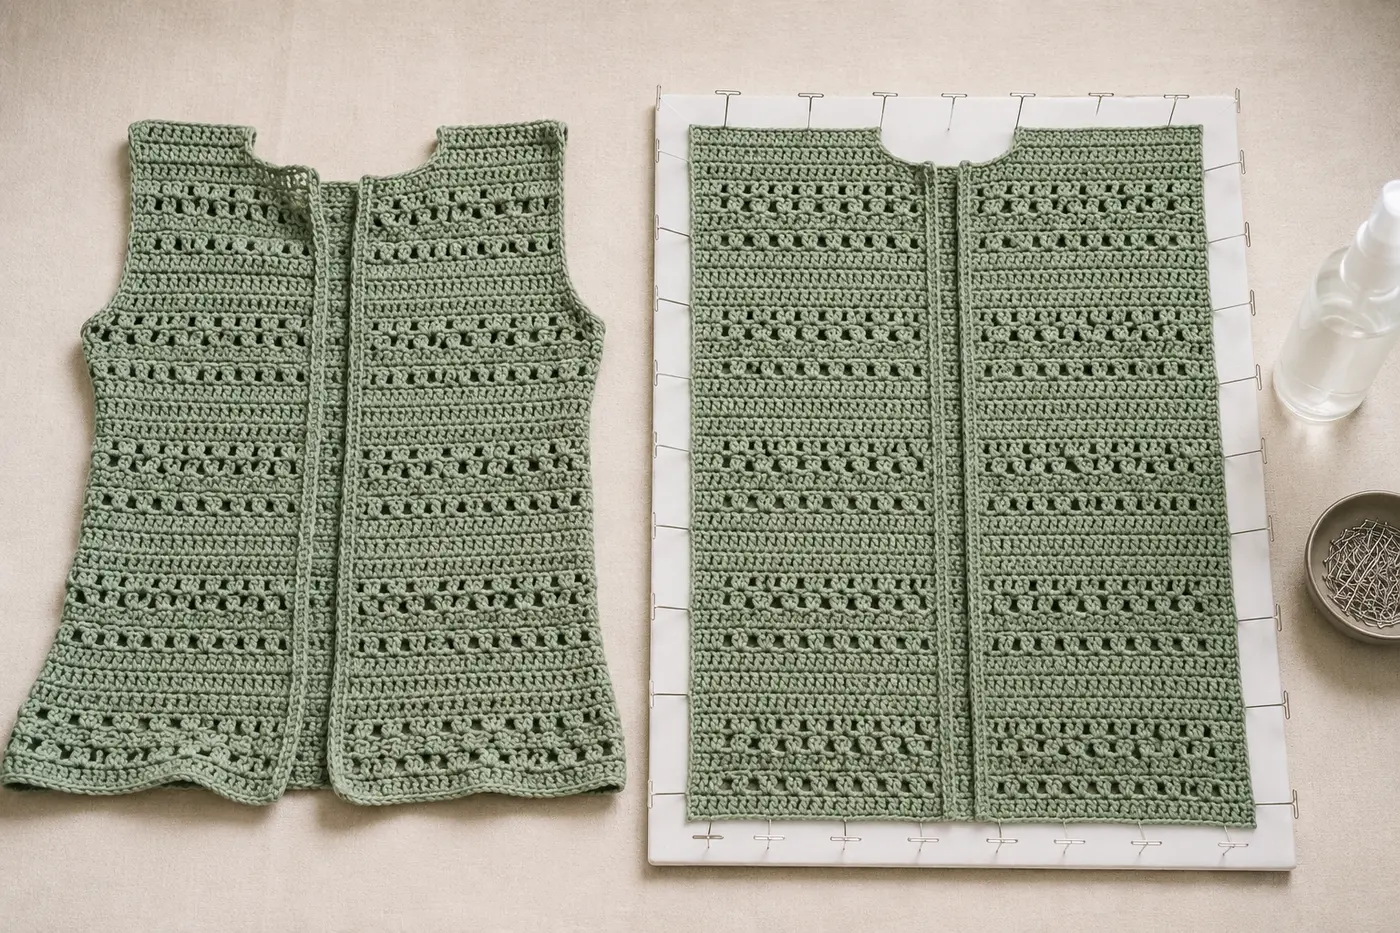
Final Blocking
After the cardigan is fully assembled, give it one final wet blocking:
- Soak in lukewarm water for 20 minutes.
- Gently squeeze out excess water and roll in a towel.
- Lay flat on blocking mats, shaping to finished measurements. Pin the front bands to keep them straight. Pin the hem to maintain an even length all around. Shape the neckline into a smooth curve.
- Allow to dry completely (24-48 hours).
Weaving in Ends
This is the unglamorous but essential final step. For garments, I recommend weaving each end in two directions — first along the row for about 1.5 inches, then turning and weaving back for another inch in the opposite direction. This “locking” technique prevents ends from working loose with wear and washing. Trim the excess close to the fabric.
For color change ends, weave them into stitches of the same color so they’re truly invisible.
Adding a Personal Label
Handmade garments deserve a label! You can purchase custom woven labels from Etsy shops like Dutch Label Shop or Wunderlabel with your name or a simple “Handmade with ♥” message. Sew the label to the inside of the back neck area or the inside of the front band. This small detail transforms your cardigan from “homemade” to “handcrafted” in the eyes of anyone who sees it.
Part 6: Wearing, Styling, and Caring for Your Cardigan
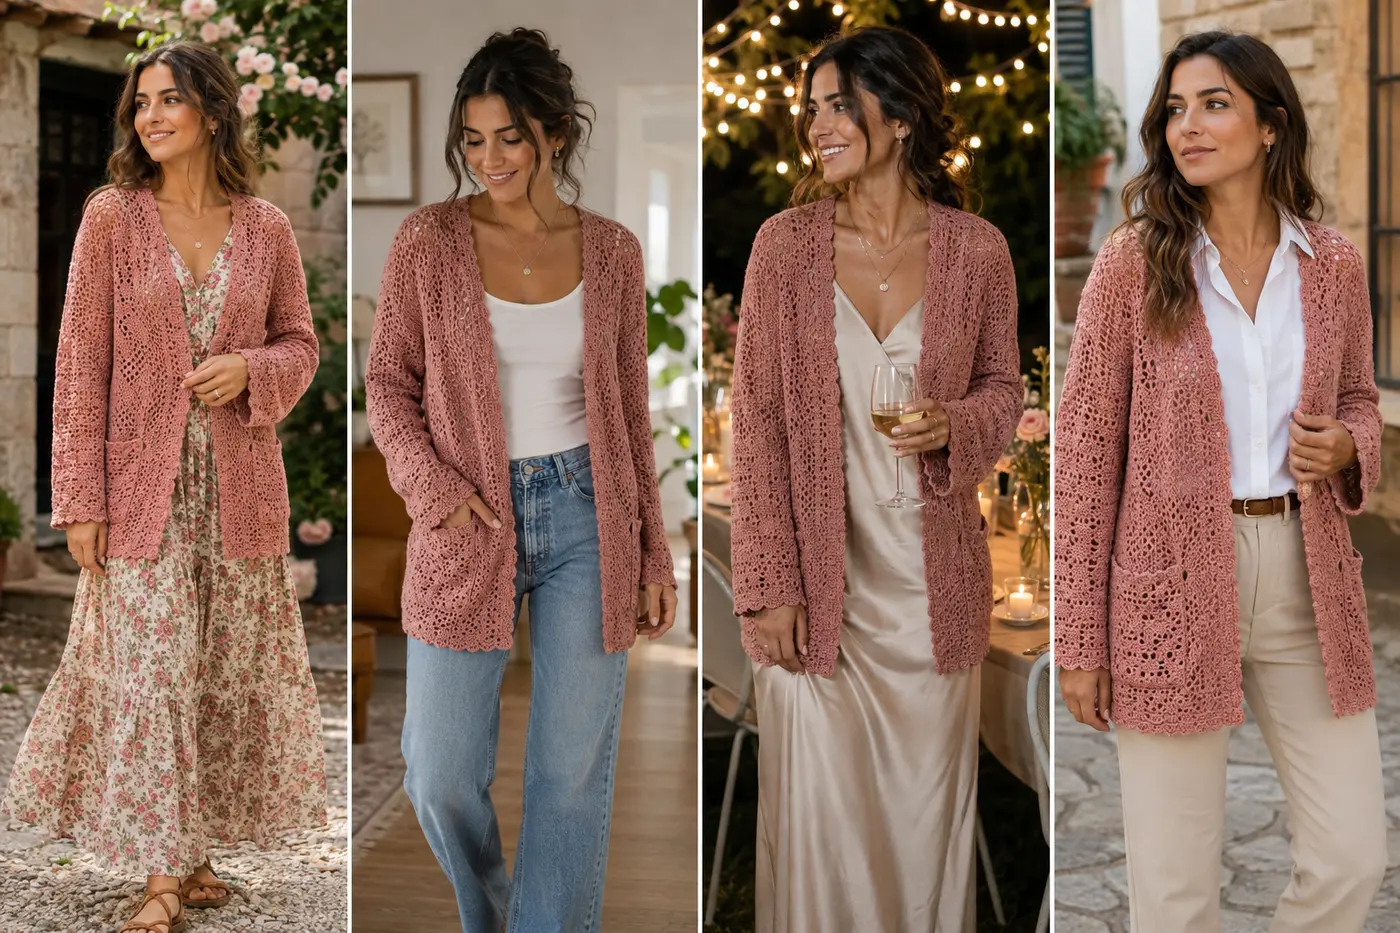
Styling Ideas
- Casual daytime: Over a fitted tank or camisole with high-waisted jeans and sneakers. The lace pattern shows beautifully over a solid-colored base layer.
- Work appropriate: Layer over a button-down shirt or silk blouse with tailored pants. The structured ribbing gives it enough polish for a creative workplace.
- Evening out: Drape over a slip dress or jumpsuit. Choose a metallic or jewel-toned yarn for extra impact.
- Cozy at home: Over a t-shirt and leggings — because the best garments are the ones you want to wear every single day.
- Beach/resort: Made in white or cream cotton, this cardigan doubles as a stunning swim cover-up.
Care Instructions
To ensure your handmade cardigan lasts for years:
- Washing: Hand wash in cool water with a gentle wool wash or baby shampoo. If you must machine wash, use a mesh garment bag on the delicate/cold cycle. Never use hot water or bleach.
- Drying: NEVER hang a wet crochet garment — the weight of the water will stretch it out of shape permanently. Lay flat on a towel, reshape to measurements, and air dry. Flip after 12 hours to allow even drying.
- Storage: Fold (don’t hang) and store in a drawer or on a shelf. For long-term storage, place in a cotton garment bag with a lavender sachet. Avoid plastic bags, which trap moisture.
- Pilling: If pilling occurs (especially with cotton-acrylic blends), use a fabric shaver or sweater stone to gently remove pills. Do this while the garment is laid flat, working in one direction.
- Re-blocking: After every 3-5 washes, give the cardigan a full wet blocking to restore its shape and stitch definition.
Part 7: Troubleshooting Common Issues
“My front panels are different lengths!”
This almost always comes down to tension inconsistency. If one panel is longer than the other, check your row counts first — they should be identical. If row counts match but lengths differ, your tension likely varied between the two pieces (this is very common). The fix: block both panels to the same length, pinning the longer one slightly compressed and the shorter one slightly stretched. Cotton yarn is forgiving and will usually accommodate a difference of up to half an inch.
“The sleeves look poofy at the cap.”
Sleeve cap ease is normal and expected. When you set the sleeve into the armhole, there should be approximately 1-1.5 inches of extra fabric in the cap compared to the armhole circumference. This ease is eased in during seaming and creates the smooth, rounded cap shape. If the cap seems excessively full, you may need to add an extra decrease row to the cap shaping.
“The V-neck is too deep/too shallow.”
The depth of the V-neck is controlled by how early you begin the neckline decreases. Starting earlier (more rows below the armhole) creates a deeper V. Starting later creates a shallower V. For a more modest neckline, begin neckline decreases 5-6 rows later than written. For a dramatic plunge, start 5-6 rows earlier. Just make sure your final shoulder stitch count still matches the back shoulder count.
“The ribbing is too tight/too loose compared to the body.”
This is a gauge issue specific to the ribbing versus the body stitch pattern. If your ribbing is significantly tighter, go up one hook size for the ribbing only. If it’s too loose, go down one hook size. The ribbing should be slightly snugger than the body — this creates the gently gathered effect at the hem and cuffs — but not so tight that it puckers.
“I ran out of yarn!”
Every crocheter’s nightmare. To avoid this: always buy one more skein than you think you need (most yarn shops accept returns of unused skeins with the receipt), and purchase all your yarn from the same dye lot. If you do run out, try to join new yarn at a seam or the beginning of a row rather than mid-row, and match the dye lot as closely as possible.
Part 8: The Bigger Picture — Why Making Your Own Clothes Matters in 2026
As I write this, the fashion industry remains one of the world’s largest polluters, responsible for approximately 10% of global carbon emissions and an estimated 92 million tons of textile waste annually. Fast fashion brands churn out 52 “micro-seasons” per year, encouraging consumers to buy cheap, wear once, and discard.
When you crochet your own cardigan, you’re making a radical statement:
- You value craftsmanship over convenience. This cardigan will take you 30-60 hours to complete. That’s 30-60 hours of mindful, intentional creation — the antithesis of clicking “Add to Cart.”
- You know exactly what’s in your clothes. You chose the fiber. You know where it came from. There are no hidden microplastics, no exploitative labor, no mystery chemicals.
- You’re building a skill that connects you to human history. Textile creation is one of humanity’s oldest technologies. When you pick up a crochet hook, you’re joining a tradition that stretches back thousands of years.
- You’re creating something that can be repaired, not replaced. A snag or hole in a crocheted garment can be mended in minutes with the same yarn and hook. Try doing that with a fast-fashion polyester blend.
The slow fashion movement isn’t about deprivation or sacrifice. It’s about choosing quality over quantity, intention over impulse, and creativity over consumption. And there’s nothing quite like the feeling of walking out the door in something you made with your own hands.
Wrapping Up
If you’ve made it this far, first of all — thank you for your dedication! You now have everything you need to create a stunning, professionally-finished crochet cardigan that fits your body, suits your style, and tells a story only you can tell.
Remember:
- Choose the right yarn — drape and memory are your best friends.
- Swatch and measure ruthlessly.
- Follow the shaping — curves make the cardigan.
- Block everything — before and after assembly.
- Take your time — this is not a race.
I can’t wait to see your “Willow” cardigans come to life. Share your progress and finished pieces on Instagram with #CrochellyWillow and tag @crochelly!
Happy crocheting, friends. Your wardrobe is about to get a whole lot more special. 🧶💛
Have questions about the pattern or need help troubleshooting? Leave a comment below or send me a DM on Instagram. I respond to every single one!
Related Posts You Might Love: