Granny Square Cardigan Pattern
Difficulty: Intermediate | Yarn Weight: Worsted (4) | Hook Size: 5.5mm The granny square cardigan is a timeless crochet classic that never goes out of style. This modern…
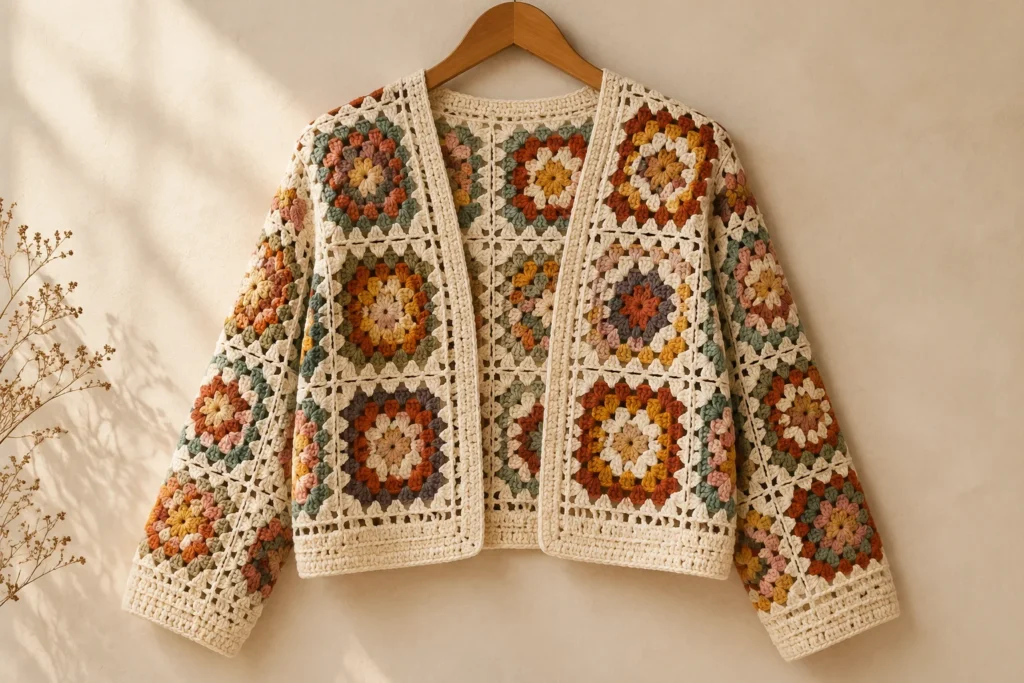
Difficulty: Intermediate | Yarn Weight: Worsted (4) | Hook Size: 5.5mm
The granny square cardigan is a timeless crochet classic that never goes out of style. This modern version combines traditional granny squares with a flattering, relaxed fit and slightly cropped length. Choose a single color for a minimalist look or go wild with a colorful patchwork design!
Materials Needed
- Worsted weight yarn – approximately 900–1,200 yards (depending on size)
- 5.5mm (I) crochet hook
- Tapestry needle
- Scissors
- 5 buttons (optional)
Sizes
S (M, L, XL, 2XL) — Instructions given for smallest size with larger sizes in parentheses.
Finished Measurements
- Bust: 36 (40, 44, 48, 52)”
- Length: 22 (22, 23, 23, 24)”
Abbreviations
- ch – chain
- dc – double crochet
- sl st – slip stitch
- sp – space
- 3dc-cl – 3 double crochet cluster
Basic Granny Square (make the required number for your size)
Rnd 1: Ch 4, sl st to form a ring. Ch 3 (counts as dc), 2 dc in ring, ch 2. [3 dc in ring, ch 2] x 3. Sl st to top of ch-3 to join. (4 groups of 3dc, 4 ch-2 corners)
Rnd 2: Sl st to corner ch-2 sp. Ch 3, 2 dc, ch 2, 3 dc in same corner sp. *Ch 1, (3 dc, ch 2, 3 dc) in next corner sp.* Repeat * to * around. Ch 1, sl st to join.
Rnds 3–5: Continue the granny square pattern, adding one additional 3dc group per side on each round. Each square should measure approximately 6″ x 6″ after Rnd 5.
Assembly Layout
Back Panel: 3 squares wide x 4 squares tall (S/M) or 4 squares wide x 4 squares tall (L/XL/2XL)
Front Panels (each): 2 squares wide x 4 squares tall
Sleeves (each): 3 squares wide x 3 squares tall, seamed into a tube
Joining
Join squares using a flat slip stitch method: Hold two squares with right sides together, and sl st through the back loops of both pieces across the edge. This creates a neat, flat seam on the right side.
Edging
Work 2 rounds of sc evenly around the entire cardigan opening (neckline, front edges, and bottom hem). Add buttonhole loops on the right front if desired: Ch 3, skip 2 sts to create each buttonhole, spacing them evenly.
Tips
Block your granny squares before assembly for a polished, professional finish. Consistent tension is key — all squares must be the same size for the cardigan to come together properly.