How to Crochet a Modern Wall Hanging: Complete Guide for Beginners
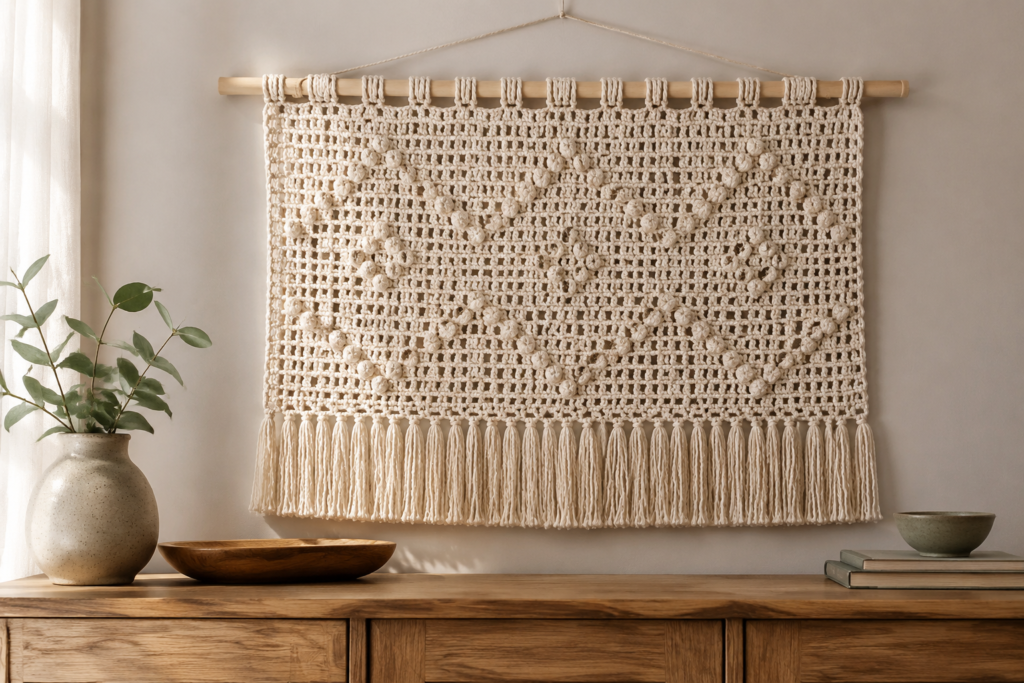
If there’s one crochet home decor project that has truly exploded in popularity over the past few years, it’s the crochet wall hanging. Scroll through Pinterest, Instagram, or any home decor blog, and you’ll find stunning textile art pieces adorning walls in every style imaginable — from minimalist Scandinavian apartments to colorful bohemian lofts.
The best part? You don’t need to be an expert crocheter to create a beautiful wall hanging. With basic stitches, the right materials, and a bit of creative vision, you can craft a piece of fiber art that becomes the focal point of any room.
In this comprehensive guide, we’ll walk you through everything you need to know about creating your own modern crochet wall hanging — from choosing materials and planning your design to step-by-step construction and finishing techniques. For more inspiration, browse our full collection of home decor crochet patterns at Crochelly.
Why Crochet Wall Hangings Are So Popular
Crochet wall hangings hit the sweet spot between several current trends:
- Fiber art movement: Textile art has entered the mainstream design world, with fiber pieces selling for hundreds (even thousands) of dollars in galleries and design shops.
- Handmade aesthetic: In an era of mass production, the visible handcraft of crochet adds authenticity and soul to a space.
- Boho-chic trend: The bohemian design trend that’s dominated interiors for years relies heavily on texture, macramé, and natural fibers — all of which crochet delivers beautifully.
- Personalization: A wall hanging is a statement piece that expresses your personal style in a way that mass-produced art cannot.
- Affordable art: Creating your own wall hanging costs a fraction of what you’d pay for a similar piece from a fiber artist or home decor boutique.
- Satisfying process: Wall hangings offer creative freedom that other crochet projects don’t — you can mix stitches, experiment with texture, and express yourself artistically.
Materials You’ll Need
Yarn
The yarn you choose dramatically affects the final look of your wall hanging. Here are the best options:
| Yarn Type | Look/Feel | Best For |
|---|---|---|
| Cotton rope (3-5mm) | Clean, modern, structured | Geometric designs, minimalist style |
| Macramé cord | Bohemian, textured, organic | Boho designs with fringe and tassels |
| Worsted weight cotton | Smooth, defined stitches | Detailed stitch patterns, colorwork |
| Chunky/bulky yarn | Cozy, substantial, textured | Quick projects, large-scale pieces |
| T-shirt yarn | Bold, thick, sculptural | Statement pieces, large designs |
| Roving/unspun wool | Ethereal, artistic, soft | Artistic pieces, mixed-media work |
Our recommendation for beginners: Start with a 3mm-5mm cotton cord or macramé rope. It’s easy to work with, holds its shape well, shows stitch definition clearly, and creates a professional-looking finished piece.
Hanging Rod
The rod from which your wall hanging suspends is an important design element. Popular options include:
- Wooden dowel: Clean, simple, available at any hardware store. Sand and stain for a polished look.
- Driftwood: Natural, organic shape adds bohemian character. Each piece is unique.
- Brass or copper tube: Modern, sleek, and elegant. Cut to size with a pipe cutter.
- Tree branch: Rustic and free! Look for a straight, dried branch approximately 1-2 inches in diameter.
- Wooden curtain rod: Pre-finished with decorative ends for an upscale look.
- Bamboo stick: Lightweight, sustainable, and gives a natural, earthy vibe.
Size guide: Your rod should extend 3-6 inches beyond each side of your wall hanging for balanced proportions.
Additional Supplies
- Crochet hook (size depends on yarn — see pattern recommendations)
- Scissors
- Tapestry needle
- Measuring tape
- Stitch markers
- Pet brush or wire brush (for creating fringe texture)
- Steam iron or garment steamer (for blocking)
Wall Hanging Design Styles
Before you start crocheting, decide on the overall style of your wall hanging. Here are the most popular approaches:
1. Half-Circle Mandala
A half-circle or semi-circle wall hanging is one of the most popular designs. You crochet a flat semi-circle using mandala-style rounds, then add fringe along the bottom edge. The result is a sunburst effect that’s absolutely stunning.
Difficulty: Beginner to Intermediate
Best for: Above beds, sofas, or console tables
2. Rectangular Panel with Fringe
A simple rectangular panel worked in rows, attached to a dowel at the top, with long fringe along the bottom. This is the easiest style for beginners and creates a classic boho look.
Difficulty: Beginner
Best for: Narrow walls, hallways, above desks
3. Layered/Tiered Design
Multiple crocheted panels layered on the same rod create depth and dimension. The back layer is longest, with each subsequent layer shorter, creating a cascading effect.
Difficulty: Intermediate
Best for: Statement walls, large blank spaces
4. Geometric/Abstract
Using color blocks, angles, and mixed stitch patterns to create a geometric or abstract composition. This style is more contemporary and works well in modern, minimalist spaces.
Difficulty: Intermediate to Advanced
Best for: Modern interiors, gallery walls
5. Botanical/Nature-Inspired
Crocheted leaves, feathers, flowers, or vines arranged on a rod or frame. These pieces bring natural beauty indoors and work beautifully in any decor style.
Difficulty: Intermediate to Advanced
Best for: Living rooms, bedrooms, plant-filled spaces
6. Woven-Look Panel
Using techniques like Tunisian crochet or the moss stitch to create a woven textile look. These pieces have a more subtle, artisanal quality that suits understated interiors.
Difficulty: Intermediate
Best for: Scandinavian, japandi, and minimalist interiors
Step-by-Step: Creating a Boho Semi-Circle Wall Hanging
Let’s walk through creating one of the most popular wall hanging designs — a boho semi-circle with fringe. This project is beginner-friendly and produces stunning results.
Materials
- Cotton rope/cord: 3mm-4mm, approximately 200-300 meters (2-3 skeins)
- Crochet hook: 5.0mm-6.0mm
- Wooden dowel: 18-24 inches long, ½ inch diameter
- Scissors
- Pet brush or wide-tooth comb
- Measuring tape
Finished Size
Approximately 18-20 inches wide x 24-28 inches long (including fringe)
Instructions
Part 1: The Semi-Circle Body
Row 1: Chain 4, work 8 double crochet (DC) into the 4th chain from hook. Turn. (9 stitches including turning chain)
Row 2: Chain 3 (counts as DC), DC in same stitch, 2 DC in each stitch across. Turn. (18 DC)
Row 3: Chain 3, DC in same stitch, *DC in next stitch, 2 DC in next stitch*. Repeat from * to * across. Turn. (27 DC)
Row 4: Chain 3, DC in same stitch, *DC in next 2 stitches, 2 DC in next stitch*. Repeat from * to * across. Turn. (36 DC)
Row 5: Chain 3, DC in same stitch, *DC in next 3 stitches, 2 DC in next stitch*. Repeat from * to * across. Turn. (45 DC)
Row 6: Chain 3, DC in same stitch, *DC in next 4 stitches, 2 DC in next stitch*. Repeat from * to * across. Turn. (54 DC)
Row 7: Chain 3, DC in same stitch, *DC in next 5 stitches, 2 DC in next stitch*. Repeat from * to * across. Turn. (63 DC)
Row 8: Chain 3, DC in same stitch, *DC in next 6 stitches, 2 DC in next stitch*. Repeat from * to * across. Turn. (72 DC)
Continue this increase pattern (adding one more DC between increases each row) until your semi-circle is approximately 16-18 inches along the straight (diameter) edge. For most cotton cord, this will be 8-10 rows.
Fasten off and weave in ends.
Part 2: Adding Fringe
The fringe is what transforms a simple crochet piece into a statement wall hanging.
- Cut fringe strands: Cut pieces of cord 16-20 inches long (they’ll fold in half, so the final fringe will be 8-10 inches). You’ll need 2-3 strands per stitch along the curved edge. For a 72-stitch edge, cut approximately 150-216 strands.
- Attach fringe: Fold 2-3 strands in half. Insert your crochet hook from back to front through a stitch along the curved edge. Pull the folded loop through, then pull the cut ends through the loop. Tighten.
- Repeat in every stitch (or every other stitch for a less dense look) along the entire curved edge.
- Brush the fringe: Using a pet brush or wide-tooth comb, brush each fringe section from top to bottom to separate the cord fibers. This creates a feathery, flowing texture that’s absolutely beautiful.
- Trim to shape: Once all fringe is brushed, trim the bottom edge into a gentle curve that mirrors the semi-circle shape above. Use sharp fabric scissors for clean cuts.
Part 3: Attaching to the Rod
- Lay the crochet piece flat with the straight edge at the top.
- Place the dowel along the top straight edge.
- Fold the top edge over the dowel by approximately 1 inch.
- Using a tapestry needle and matching yarn, whip stitch the folded edge to the back of the piece, encasing the dowel.
- Alternatively, you can crochet a channel: work a row of single crochet along the top edge, folding over the dowel as you go.
- Cut a piece of cord approximately 24 inches long and tie each end to the dowel beyond the edges of the crochet piece. This creates the hanging loop.
Part 4: Final Touches
- Steam blocking: Hold a garment steamer 2-3 inches from the crochet body (not the fringe) and gently steam to even out stitches and relax the fabric.
- Final trim: Step back and look at your piece from a distance. Trim any uneven fringe.
- Optional embellishments: Add wooden beads threaded onto some fringe strands, weave in metallic thread, or attach dried flowers for extra personality.
Design Variations and Customizations
Adding Color
Introduce color to your wall hanging with these techniques:
- Ombre effect: Use different shades of the same color for each row, transitioning from light at the top to dark at the bottom (or vice versa).
- Color blocking: Change colors every 2-3 rows for bold horizontal stripes.
- Accent color fringe: Keep the body neutral and use a bold color for the fringe.
- Dip-dyed fringe: Dip the bottom few inches of natural cotton fringe in fabric dye for an ombre effect (works best with natural, undyed cord).
- Rainbow: Change colors every row for a vibrant rainbow semi-circle.
Adding Texture
- Bobble rows: Intersperse rows of bobble stitches for raised texture.
- Popcorn stitches: Add clusters of popcorn stitches in a pattern for dramatic dimension.
- Post stitches: Use front post and back post double crochet to create ribbing or cable effects.
- Mixed media: Weave in copper wire, wooden beads, or dried botanical elements for unique artistic touches.
- Tassels: Add tassels at intervals along the fringe line instead of (or in addition to) brushed fringe.
Size Variations
- Mini wall hanging (8-10″ wide): Perfect for gallery walls, small spaces, or groupings. Great for practicing before committing to a large piece.
- Medium wall hanging (18-24″ wide): The standard size, ideal above beds, sofas, or console tables.
- Large statement piece (30-48″ wide): A dramatic focal point for large blank walls. Requires more yarn and time but creates an unforgettable impact.
Placement and Hanging Tips
Where to Hang Your Crochet Wall Art
- Above the bed: Center the wall hanging above your headboard for a dramatic bedroom focal point. Ensure it’s securely mounted — you don’t want it falling on sleeping heads!
- Above the sofa: A popular choice that anchors the living room. The wall hanging should be approximately 2/3 the width of the sofa for balanced proportions.
- Entryway: Welcome guests with a beautiful textile piece as the first thing they see.
- Gallery wall: Mix smaller crochet wall hangings with framed art, photographs, and other wall decor for an eclectic gallery arrangement.
- Nursery: A gentle, neutral-toned wall hanging adds warmth and texture to a baby’s room.
- Stairway wall: The large blank wall along a staircase is the perfect canvas for a statement wall hanging.
- Bathroom: A smaller wall hanging can add unexpected boho charm to a bathroom. Use cotton cord that can handle humidity.
Hanging Height Guidelines
- Above furniture: Hang 6-12 inches above the top of the furniture piece.
- On an empty wall: Center the piece so the middle is at approximately eye level (57-60 inches from the floor).
- Above a bed: Hang 8-12 inches above the top of the headboard.
Hardware
Use appropriate hardware based on your wall type and the weight of your wall hanging:
- Lightweight pieces: Command hooks or adhesive strips (damage-free, renter-friendly)
- Medium weight: Standard picture hooks with nails
- Heavy pieces: Wall anchors or screws directly into studs
Care and Maintenance
To keep your crochet wall hanging looking its best:
- Dust regularly: Use a lint roller or soft brush to remove dust and pet hair.
- Avoid direct sunlight: Prolonged sun exposure can fade colors. If placement near a window is unavoidable, consider UV-resistant yarn.
- Spot clean: For small stains, spot clean with a damp cloth and mild soap.
- Deep clean: If needed, remove from the rod and hand wash in cool water with gentle detergent. Reshape and air dry flat before rehanging.
- Re-brush fringe: Over time, brushed fringe may compress. Give it a quick brush to restore its fluffy texture.
- Trim as needed: Fringe may become uneven over time — a quick trim keeps it looking fresh.
Start Creating Your Wall Art
A crochet wall hanging is more than just decor — it’s a piece of art that you created with your own hands. Every stitch holds your time, creativity, and personality. When guests compliment it (and they will), you’ll feel a pride that no store-bought piece could ever provide.
Explore our full range of home decor crochet patterns at Crochelly for wall hanging patterns and many more projects to beautify your home. From your first simple panel to elaborate multi-layered fiber art, your walls are waiting for your creative touch.
Have you made a crochet wall hanging? We’d love to see it! Share your photos and tell us about your experience in the comments below.