How to Read Crochet Symbols: A Simple Beginner’s Guide
Learn how to read crochet symbols and charts with a simple stitch key, row and round directions, repeats, increases, decreases, and beginner tips.
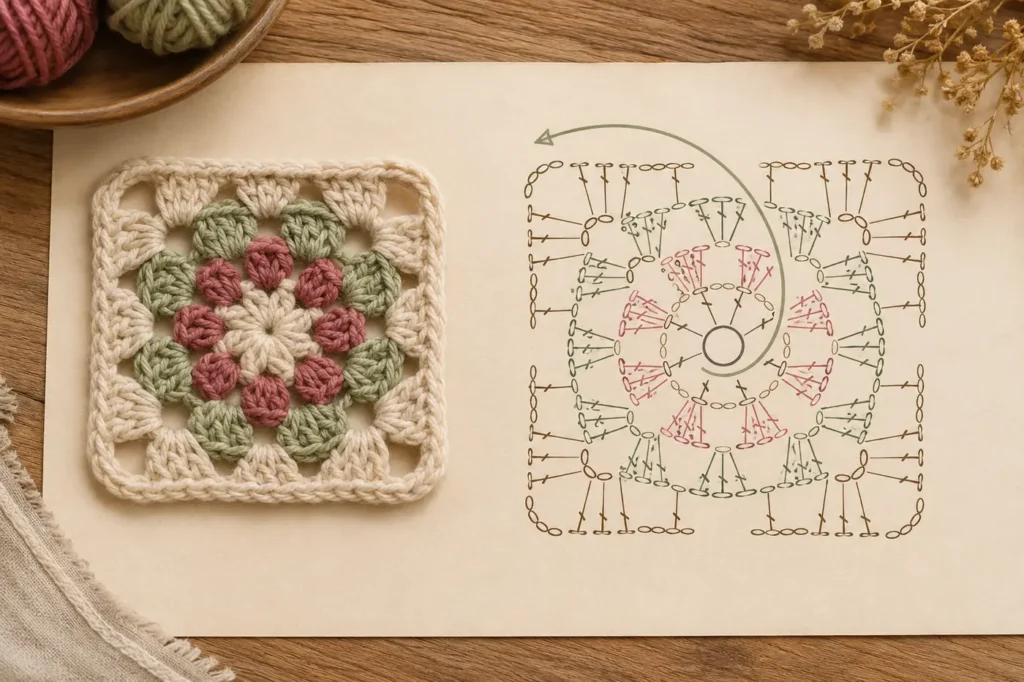
Crochet charts can look like a secret code, but each mark simply represents one stitch or action. Once you know the basic symbols and where to begin, you can follow patterns in any language and see the shape of a project before you pick up your hook.
This guide uses standard US crochet terms. Always check the symbol key supplied with your pattern because a designer may use a slightly different convention.
Crochet symbols at a glance
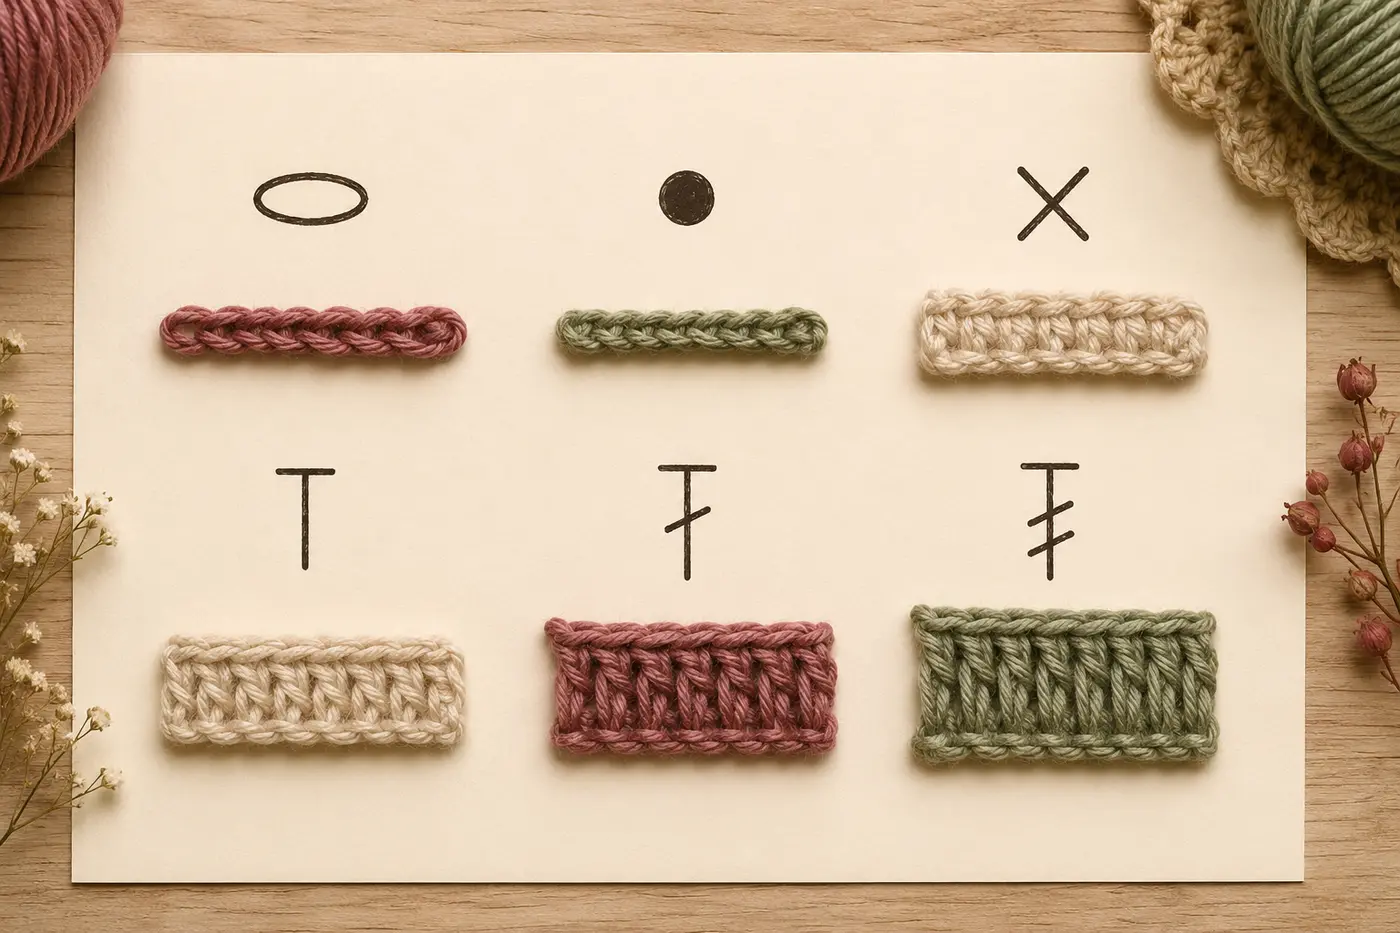
Start by learning the small group of symbols that appears in most beginner charts:
- Chain (ch): a small open oval.
- Slip stitch (sl st): a filled dot or very small solid oval.
- Single crochet (sc): a plus sign or an X.
- Half double crochet (hdc): a T shape.
- Double crochet (dc): a T with one slash across the stem.
- Treble crochet (tr): a T with two slashes across the stem.
How taller stitches are shown
A taller stitch usually has a taller symbol. The horizontal bar at the top represents the top loops of the stitch. Slashes across the stem show how many yarn overs you make before inserting the hook: one slash for a double crochet, two for a treble crochet, and three for a double treble crochet.
Where do you start reading a crochet chart?
First look for a starting chain, a foundation row, or a center ring. Then find any arrow or round number. Charts worked in rows and charts worked in rounds are read differently.
Charts worked in rows
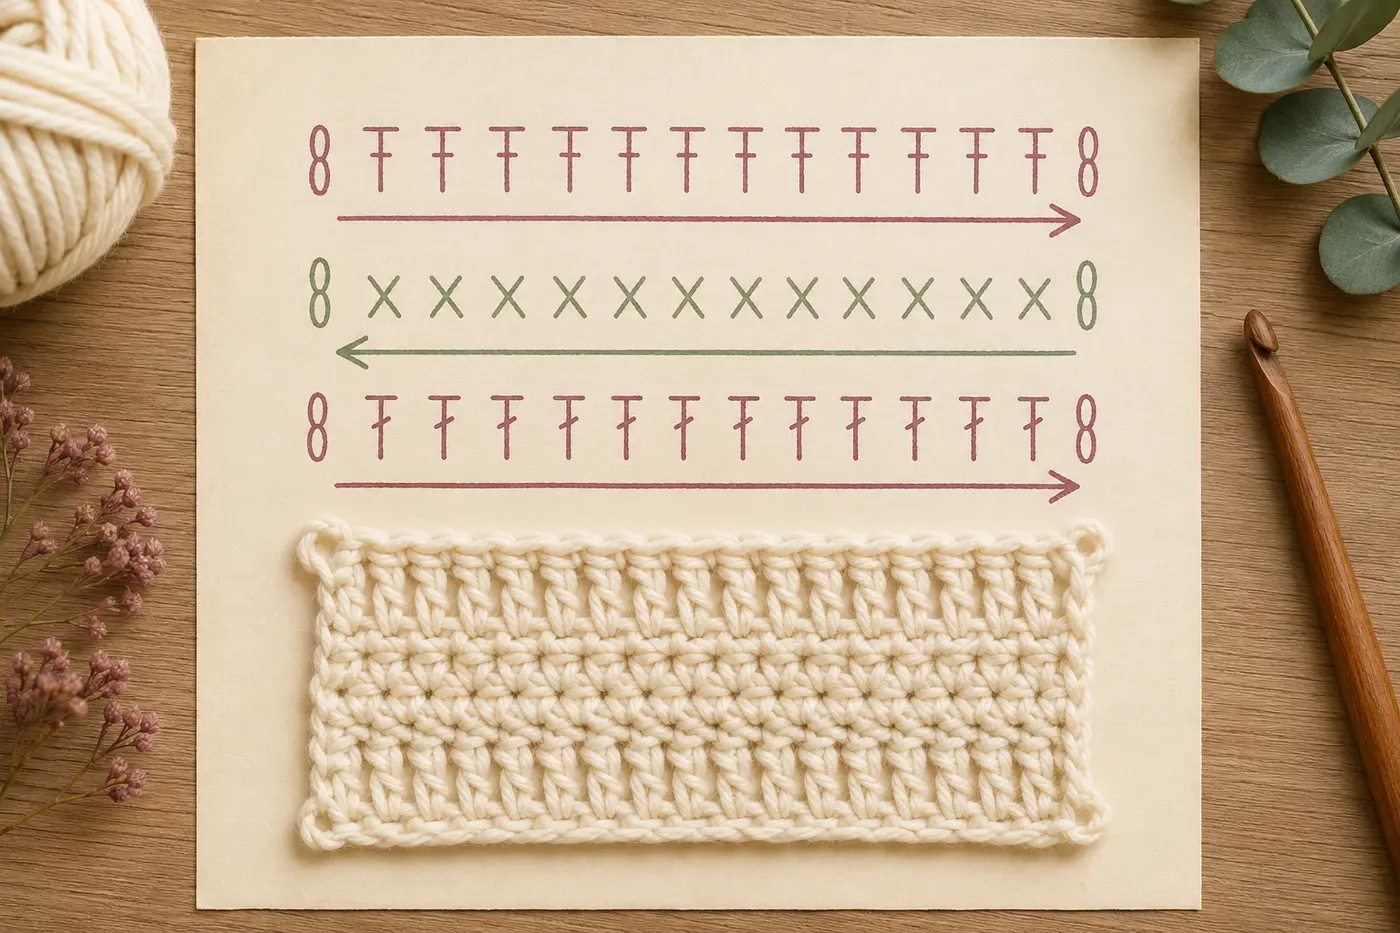
Begin at the foundation chain. Read the first row in the direction shown by the arrow. Flat crochet normally alternates direction: one row is read from right to left, the next from left to right. A turning chain at the edge lifts the hook to the height needed for the next row.
Charts worked in rounds
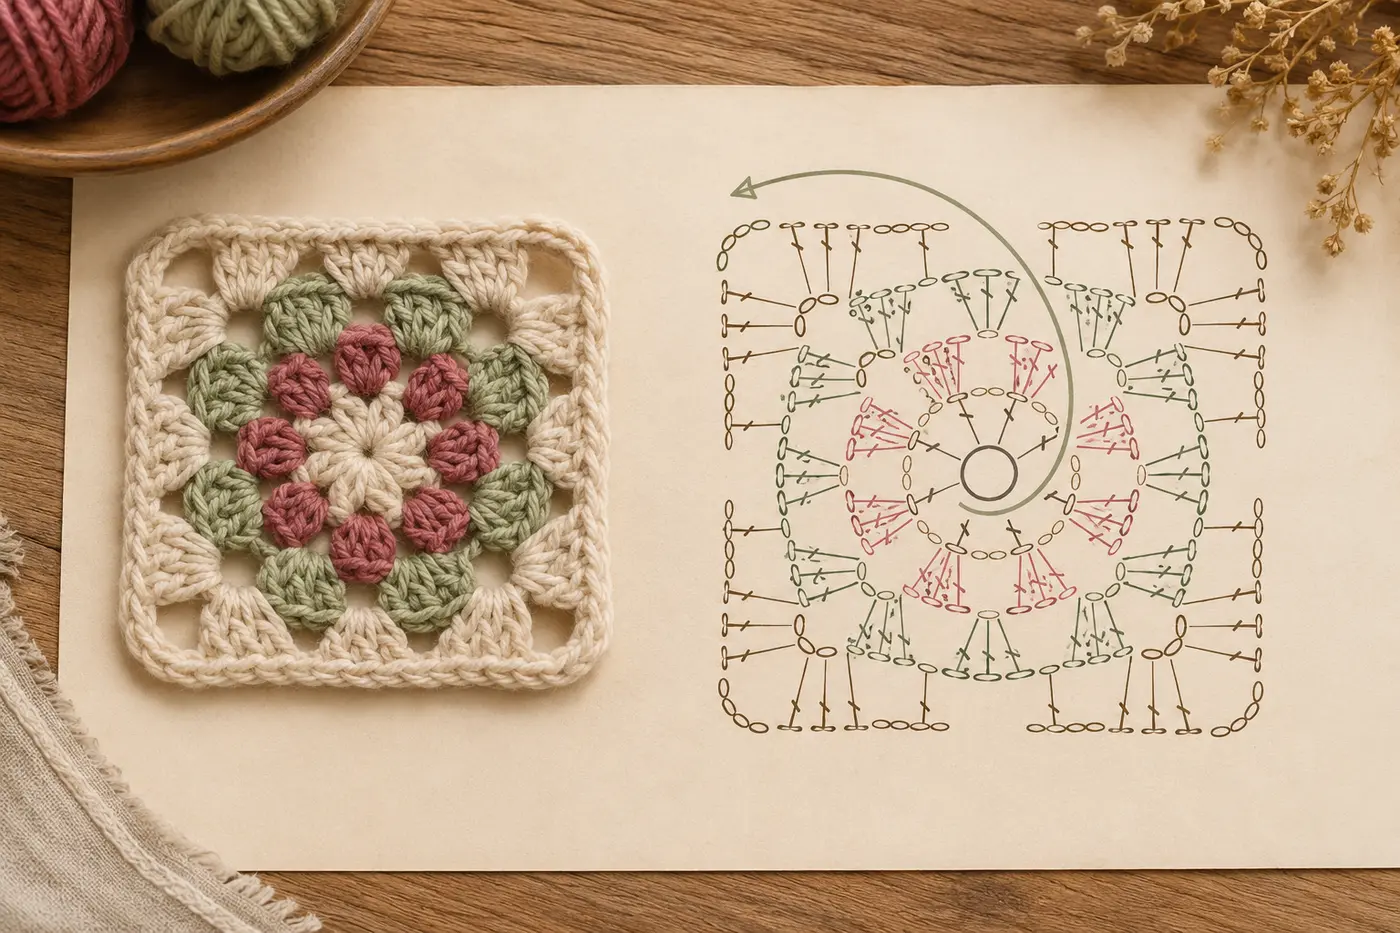
For circles, granny squares, and motifs, begin in the center. Follow the symbols around the starting ring, then move outward one round at a time. Most right-handed charts travel counterclockwise. A slip-stitch symbol often shows where a joined round closes.
How repeats are marked
A chart avoids drawing or writing the same instruction repeatedly. Brackets, curved lines, shaded sections, or a boxed group can mark the stitches you need to repeat. Complete the whole marked group, then repeat it for the stated number of times or until the end of the row or round.
How increases and decreases look
- Increase: two or more stitch symbols grow from the same base point. Work all of those stitches into one stitch or space.
- Decrease: two stitch symbols join at the top. Begin each stitch separately, then finish them together.
- Cluster: several partly completed stitches share one top. Follow the pattern key because cluster construction can vary.
A simple 5-step method for reading any chart
- Read the pattern’s symbol key and confirm whether it uses US or UK terms.
- Find the starting point: foundation chain, magic ring, or center chain space.
- Trace one complete row or round with your finger before crocheting.
- Identify repeats, corner groups, increases, and decreases.
- Crochet one small section at a time and compare your fabric with the chart shape.
Beginner mistakes to avoid
- Do not assume every T-shaped symbol means the same stitch; count the slashes.
- Do not skip chain spaces. They often create corners, arches, or openings.
- Do not read every row in the same direction when the work is turned.
- Do not rely on symbol shape alone. Check where its base touches the previous row.
- If the fabric grows too quickly or cups inward, stop and recount the repeat before continuing.
US and UK terminology
The chart symbol may stay the same while the stitch name changes. For example, the symbol called single crochet in US terminology is called double crochet in UK terminology. The pattern’s terminology note and stitch key are therefore just as important as the chart itself.
Quick practice idea
Choose a small granny square or simple flat swatch with both written instructions and a chart. Crochet the first row from the written pattern, then point to each matching symbol. Repeat with the next row until the symbols feel familiar. Soon you will be able to use the chart as your main map and the written instructions only as a check.
Frequently asked questions
Do all crochet patterns use the same symbols?
Most use widely recognized conventions, but small differences occur. Always follow the key printed with the specific pattern.
Are crochet charts easier than written patterns?
They are often faster once learned because you can see stitch placement, repeats, and the finished shape. Many beginners find it easiest to use the chart and written instructions together.
Can left-handed crocheters use the same chart?
Yes. A left-handed crocheter may find it easier to mirror the reading direction. The stitch relationships and repeat structure stay the same.
Save this guide and practice with one small chart. You do not need to memorize every possible symbol—recognizing the common stitches and reading direction is enough to get started.