Crochet Snowflake Patterns: 15 Stunning Designs to Transform Your Winter Decor
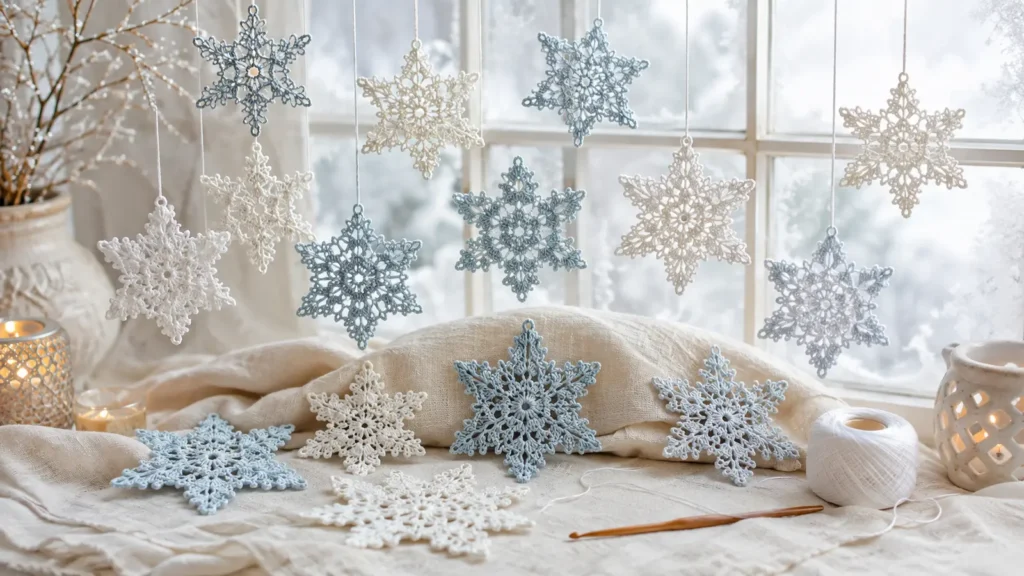
Crochet Snowflake Patterns: 15 Stunning Designs to Transform Your Winter Decor
There’s something truly magical about crochet snowflakes. Each one is unique — just like real snowflakes — and they carry with them the warmth of handmade love, even though they represent the coldest season of the year. Whether you’re decorating your Christmas tree, creating a winter wonderland garland, or gifting delicate ornaments to loved ones, crochet snowflakes are one of the most timeless and rewarding seasonal crochet projects you can undertake.
In this comprehensive guide, we’ll walk you through everything you need to know about crocheting snowflakes — from choosing the right yarn and hooks to mastering the techniques that make your snowflakes crisp, symmetrical, and breathtakingly beautiful. We’ve also included 15 pattern ideas ranging from beginner-friendly to advanced, so no matter your skill level, you’ll find inspiration here.
Why Crochet Snowflakes Are the Ultimate Winter Project
Crochet snowflakes hold a special place in the world of seasonal crafting, and for good reason. They sit at the perfect intersection of art, tradition, and practicality. Here’s why they deserve a spot in your winter crochet rotation:
They’re Quick and Satisfying
Unlike afghans or sweaters that can take weeks or even months, most crochet snowflakes can be completed in 15 to 45 minutes. That instant gratification is incredibly motivating, especially during the dark winter months when you want to see results fast. You can easily make a dozen in a single evening while watching your favorite holiday movie.
They Use Minimal Yarn
If you’re a crocheter, chances are you have a stash of crochet thread or lightweight yarn that’s been waiting for the right project. Snowflakes are the perfect stash-busters. A single ball of size 10 crochet thread can yield 20 to 30 snowflakes, making this one of the most economical crochet projects around.
They’re Deeply Rooted in Tradition
Crocheted snowflakes have been a holiday tradition for generations. In many families, they’re passed down as heirlooms — carefully packed away each January and brought out again the following December, each one carrying memories of the year it was made. Starting your own snowflake tradition is a beautiful way to create lasting memories.
They Make Perfect Gifts
A handmade crochet snowflake is the kind of gift that people treasure. Package one in a small box with tissue paper, attach it to a wrapped present as a gift topper, or include a set of six in a clear ornament box. They’re lightweight, easy to mail, and universally appreciated.
Essential Materials and Tools
Before you begin your snowflake journey, let’s make sure you have everything you need. The right materials make a significant difference in the finished quality of your snowflakes.
Yarn and Thread Options
| Thread/Yarn Type | Size | Best For | Recommended Brands |
|---|---|---|---|
| Crochet Thread Size 10 | Fine | Classic, delicate snowflakes | Aunt Lydia’s, DMC Petra |
| Crochet Thread Size 20 | Very Fine | Ultra-delicate, lacy designs | Lizbeth, Olympus |
| Crochet Thread Size 5 | Medium | Larger, more visible snowflakes | Aunt Lydia’s Classic |
| Fingering Weight Yarn | 1/Super Fine | Soft, yarn-like texture | Scheepjes Catona, KnitPicks |
| DK or Worsted Weight | 3–4 | Beginner-friendly, large snowflakes | Any cotton yarn |
| Metallic Thread | Varies | Sparkly, glamorous snowflakes | Kreinik, DMC Diamant |
Pro Tip: For the crispest, most defined snowflakes, always choose 100% cotton thread or yarn. Cotton holds its shape after stiffening far better than acrylic or blended fibers. Mercerized cotton is even better — it has a subtle sheen that gives your snowflakes an elegant, polished look.
Hooks
Your hook size should correspond to your thread or yarn choice:
- Size 10 thread: Steel hook 1.5mm–1.75mm (US size 7 or 6 steel)
- Size 20 thread: Steel hook 1.0mm–1.25mm (US size 10 or 9 steel)
- Size 5 thread: Steel hook 1.75mm–2.0mm (US size 5 or 4 steel)
- Fingering weight yarn: 2.25mm–2.75mm hook
- DK/Worsted weight: 3.5mm–5.0mm hook
If you’re new to working with crochet thread, consider investing in an ergonomic steel hook with a cushioned handle. Brands like Clover Soft Touch and Susan Bates Silvalume with comfort grips can prevent hand fatigue during long crafting sessions.
Additional Supplies
- Sharp scissors — Small embroidery scissors work best for precise cuts
- Tapestry needles — For weaving in ends (choose a fine-tipped needle for thread work)
- Rust-proof blocking pins — T-pins or quilting pins
- Blocking board or foam mat — Covered with plastic wrap
- Fabric stiffener — Stiffy, Aleene’s, or homemade starch solution
- Wax paper — For drying stiffened snowflakes
- Pattern holder or tablet — To keep your pattern visible while working
Key Techniques for Perfect Snowflakes
Crochet snowflakes may be small, but they pack a lot of technique into their delicate frames. Mastering these fundamentals will dramatically improve the quality of your finished pieces.
1. The Magic Ring (Adjustable Loop)
Almost every snowflake begins at the center, and the magic ring is the gold standard for starting. Unlike the chain-and-join method, a magic ring pulls completely closed, leaving no hole in the center of your snowflake. This creates a neater, more professional look.
How to make a magic ring:
- Wrap the thread around your fingers to form a loop, with the tail end crossing over the working yarn.
- Insert your hook through the loop from front to back.
- Yarn over and pull through the loop.
- Chain 1 to secure (this does not count as a stitch).
- Work your first round of stitches into the ring.
- Pull the tail to close the ring tightly.
If you struggle with the magic ring in fine thread, an alternative is to chain 4 or 5 and slip stitch to join into a ring. The center hole will be slightly larger, but it’s perfectly acceptable and much easier for beginners.
2. Picots
Picots are the tiny decorative loops that give snowflakes their characteristic spiky, crystalline appearance. They’re deceptively simple but make an enormous visual impact.
Standard picot: Chain 3, slip stitch into the first chain. That’s it! The result is a small, pointed loop that mimics the points of a real ice crystal.
Variations:
- Small picot: Chain 2, slip stitch back — creates a subtle bump
- Medium picot: Chain 3, slip stitch back — the most common
- Large picot: Chain 4 or 5, slip stitch back — creates dramatic points
- Double picot: Two picots worked side by side — adds fullness
- Triple picot (clover): Three picots in sequence — creates a cluster effect
3. Chain Spaces and Arches
The open, lacy quality of snowflakes comes from strategic use of chain spaces. Longer chains create larger openings that let light pass through, while shorter chains keep the design tight and compact. Most snowflake patterns alternate between solid stitch sections and chain arches to create contrast and visual interest.
4. Working in Rounds
Snowflakes are always worked in the round, radiating outward from the center. Most snowflakes have 6 or 8 points (six being more common, as real snowflakes have six-fold symmetry). Each round builds upon the previous one, and maintaining consistent tension throughout is crucial for symmetry.
Key tip: At the end of each round, join with a slip stitch to the appropriate stitch (usually the first stitch or a specific chain of the round). Be careful not to join to the wrong stitch, as this will throw off the symmetry of your snowflake.
5. Tension Control
This is perhaps the single most important factor in creating beautiful snowflakes. Your tension should be:
- Firm but not tight — Too-tight tension makes the snowflake curl and pucker; too-loose tension makes it floppy and shapeless
- Consistent throughout — Even slight variations in tension become visible in the finished piece
- Appropriate for the stiffening method — If you plan to stiffen your snowflakes heavily, slightly looser tension is fine; if you want them to hold their shape without stiffener, crochet more tightly
Beginner Snowflake Patterns (1–5)
These patterns use basic stitches — chains, slip stitches, single crochet, and double crochet — and can be completed in 1 to 3 rounds. They’re perfect for your first foray into snowflake making.
Pattern 1: The Simple Star Snowflake
Skill Level: Beginner
Finished Size: Approximately 3 inches (with size 10 thread and 1.65mm hook)
Rounds: 2
Time Estimate: 10–15 minutes
This is the quintessential first snowflake. It’s small, quick, and introduces you to the basic structure of snowflake construction. The finished piece has six clean points with picot tips.
Stitches Used: Chain (ch), slip stitch (sl st), single crochet (sc), double crochet (dc), picot
Instructions:
Round 1: Make a magic ring. Ch 1, work 12 sc into the ring. Sl st to join to the first sc. Pull ring closed. (12 sc)
Round 2: *Ch 5, skip 1 sc, sl st in next sc.* Repeat from * to * around. You should have 6 chain-5 loops. (6 loops)
Round 3: Sl st into the first ch-5 loop. *In the ch-5 loop, work: 1 sc, 1 hdc, 3 dc, ch 3, sl st in first ch (picot made), 2 dc, 1 hdc, 1 sc. Sl st into the next loop.* Repeat from * to * around. Fasten off. Weave in ends.
Tips for this pattern: Focus on making each of the six points identical. Count your stitches in each loop carefully, and make sure your picots are all the same size.
Pattern 2: The Classic Chain Snowflake
Skill Level: Beginner
Finished Size: Approximately 3.5 inches
Rounds: 3
Time Estimate: 15–20 minutes
This snowflake relies heavily on chain stitches to create an airy, open design. It’s perfect for window decorations because light passes through the open spaces beautifully.
Instructions:
Round 1: Ch 6, sl st to join into a ring. Ch 3 (counts as first dc), work 11 dc into the ring. Sl st to top of ch-3 to join. (12 dc)
Round 2: Ch 1, sc in same st. *Ch 5, skip 1 dc, sc in next dc.* Repeat from * to * around, ending with ch 5, sl st to first sc. (6 ch-5 loops)
Round 3: Sl st into the first ch-5 space. *In the ch-5 space, work: sc, ch 3, dc, ch 3 picot, ch 3, dc, ch 3, sc.* Repeat from * to * in each ch-5 space around. Sl st to first sc. Fasten off.
Pattern 3: The Tiny Ornament Snowflake
Skill Level: Beginner
Finished Size: Approximately 2.5 inches
Rounds: 2
Time Estimate: 10 minutes
The smallest and quickest snowflake in our collection. These are ideal for making in bulk — think garlands, package toppers, or filling a glass jar as a centerpiece.
Instructions:
Round 1: Magic ring. Ch 3 (counts as dc), 2 dc in ring, *ch 3, 3 dc in ring.* Repeat from * to * 4 more times. Ch 3, sl st to top of ch-3. (6 groups of 3 dc, 6 ch-3 spaces)
Round 2: *Sl st to the ch-3 space. In the ch-3 space, work: sc, ch 4, sl st in first ch (large picot), ch 4, sl st in first ch (second large picot), ch 4, sl st in first ch (third large picot), sc.* Repeat from * to * around. Sl st to join. Fasten off.
Pattern 4: The Double Crochet Snowflake
Skill Level: Beginner
Finished Size: Approximately 4 inches
Rounds: 3
Time Estimate: 20 minutes
This slightly larger snowflake features a solid center with open, branching arms. The double crochet clusters create a satisfying texture that catches the light beautifully.
Instructions:
Round 1: Magic ring. Ch 3, dc in ring, ch 2. *2 dc in ring, ch 2.* Repeat 4 more times. Sl st to top of ch-3. (6 pairs of dc, 6 ch-2 spaces)
Round 2: Sl st to ch-2 space. Ch 3, dc, ch 2, 2 dc in same space (shell made). *Ch 1, in next ch-2 space work: 2 dc, ch 2, 2 dc (shell).* Repeat from * to * around. Ch 1, sl st to top of ch-3. (6 shells)
Round 3: Sl st to ch-2 space of shell. *In shell ch-2 space work: sc, ch 5, dc in 4th ch from hook, ch 1, sc in same ch-2 space. Ch 3, sc in ch-1 space between shells, ch 3.* Repeat from * to * around. Sl st to first sc. Fasten off.
Pattern 5: The Puff Stitch Snowflake
Skill Level: Confident Beginner
Finished Size: Approximately 3.5 inches
Rounds: 2
Time Estimate: 15 minutes
This design introduces the puff stitch, adding dimensional texture to your snowflake. The puffy clusters at each point give it a soft, pillowy quality that’s different from the typical lacy snowflake.
Puff Stitch: (Yarn over, insert hook, pull up a loop) 3 times in the same stitch or space (7 loops on hook). Yarn over and pull through all 7 loops. Ch 1 to close.
Instructions:
Round 1: Magic ring. *Puff stitch in ring, ch 3.* Repeat 5 more times. Sl st to top of first puff. (6 puff stitches)
Round 2: *In ch-3 space work: sc, ch 4, puff stitch, ch 3 picot, ch 4, sc. Sl st to top of next puff.* Repeat from * to * around. Fasten off.
Intermediate Snowflake Patterns (6–10)
These patterns introduce more complex stitch combinations, longer sequences, and increased round counts. They’re ideal for crocheters who are comfortable reading patterns and working with fine thread.
Pattern 6: The Cathedral Window Snowflake
Skill Level: Intermediate
Finished Size: Approximately 4.5 inches
Rounds: 4
Time Estimate: 25–30 minutes
Named for the way light filters through its open spaces — reminiscent of stained glass windows — this snowflake features a central rosette surrounded by arching spokes and delicate picot-tipped points. The interplay between solid and open sections creates a stunning visual depth.
This pattern uses front post double crochet (fpdc) in Round 3 to create a raised texture at the junctions. This small detail adds a three-dimensional quality that elevates the entire design.
Pattern 7: The Cluster Point Snowflake
Skill Level: Intermediate
Finished Size: Approximately 5 inches
Rounds: 4
Time Estimate: 30–35 minutes
This design features bold cluster stitches at each of its six points, surrounded by delicate chain arches. The contrast between the dense clusters and the airy chains creates a striking visual effect that looks far more complex than it actually is.
Pattern 8: The Starlight Snowflake
Skill Level: Intermediate
Finished Size: Approximately 5 inches
Rounds: 5
Time Estimate: 35–40 minutes
With five rounds and a more intricate outer edge, this snowflake has a layered quality that creates depth and dimension. The extended double crochet stitches in the outer round give the points a graceful, elongated shape that’s particularly elegant.
Pattern 9: The Filet Snowflake
Skill Level: Intermediate
Finished Size: Approximately 4 inches
Rounds: 4
Time Estimate: 25 minutes
Inspired by filet crochet, this snowflake uses a grid-like structure of double crochet stitches and chain spaces to create a geometric pattern. The result is a more structured, architectural snowflake that appeals to those who love clean lines and mathematical precision.
Pattern 10: The Irish Rose Snowflake
Skill Level: Intermediate
Finished Size: Approximately 5.5 inches
Rounds: 5
Time Estimate: 40 minutes
This unique design merges snowflake construction with elements of Irish crochet, featuring a central flower motif that transitions into a traditional snowflake border. It’s a beautiful fusion of two beloved crochet traditions and makes a particularly lovely ornament or gift.
Advanced Snowflake Patterns (11–15)
These patterns are for experienced crocheters who relish a challenge. They feature complex stitch combinations, multiple branching points, and intricate outer edges that require patience and precision.
Pattern 11: The Ice Crystal Snowflake
Skill Level: Advanced
Finished Size: Approximately 6 inches
Rounds: 6
Time Estimate: 45–50 minutes
This snowflake mimics the complex branching patterns of actual ice crystals. Each of its six primary arms branches into secondary and tertiary points, creating a design of extraordinary intricacy. Working in size 10 thread, the finished piece is breathtakingly detailed.
Pattern 12: The Pineapple Snowflake
Skill Level: Advanced
Finished Size: Approximately 7 inches
Rounds: 8
Time Estimate: 60–75 minutes
The pineapple motif — one of the most beloved in all of crochet — is reimagined here as a snowflake. Six pineapple fans radiate from a central ring, each one tapering to a delicate point. This is a true showpiece that demands (and rewards) your full attention.
Pattern 13: The Bruges Lace Snowflake
Skill Level: Advanced
Finished Size: Approximately 6.5 inches
Rounds: Worked as a continuous strip and joined
Time Estimate: 75–90 minutes
This innovative design uses the Bruges lace technique — working a narrow ribbon of crochet that curves and joins to itself — to form a snowflake shape. The result is a design with a distinctly different texture and appearance from traditional snowflakes, featuring smooth, ribbon-like arms with an almost woven quality.
Pattern 14: The 3D Layered Snowflake
Skill Level: Advanced
Finished Size: Approximately 5 inches
Components: 2 separate pieces joined together
Time Estimate: 50–60 minutes
This design takes snowflake crafting into three dimensions. Two separate snowflakes — one slightly smaller than the other — are crocheted independently and then layered and stitched together at the center. The offset points create a complex, multi-layered effect that’s absolutely stunning when hung where it can spin and catch the light.
Pattern 15: The Heirloom Doily Snowflake
Skill Level: Advanced
Finished Size: Approximately 8 inches
Rounds: 10
Time Estimate: 90–120 minutes
The crown jewel of our collection. This large, elaborate snowflake blurs the line between snowflake and doily, featuring multiple rings of intricate lacework that build to a spectacular pointed edge. Worked in size 20 thread with a 1.0mm hook, it produces a piece of extraordinary delicacy — the kind of snowflake that becomes a family heirloom, displayed prominently and admired year after year.
How to Stiffen and Block Your Snowflakes
Stiffening is what transforms a limp, curling circle of thread into a crisp, flat, display-worthy snowflake. This step is non-negotiable — even the most beautifully crocheted snowflake will look disappointing without proper stiffening and blocking.
Method 1: Commercial Fabric Stiffener (Recommended)
Products like Stiffy, Aleene’s Fabric Stiffener, or Mod Podge Stiffy are specifically designed for this purpose and produce reliable, consistent results.
- Prepare your workspace: Cover your blocking board with plastic wrap or wax paper.
- Soak the snowflake: Pour a small amount of stiffener into a shallow dish. Submerge the snowflake completely, working the stiffener into every stitch with your fingers.
- Remove excess: Gently squeeze (don’t wring) the snowflake between your fingers to remove excess stiffener. It should be thoroughly saturated but not dripping.
- Pin to the board: Place the snowflake on your prepared board. Pin the center first, then pin each point, gently stretching and positioning for perfect symmetry. Pin each picot and chain loop open.
- Dry completely: Allow to dry for 24 hours, or until completely stiff. For faster drying, use a fan or hair dryer on a cool setting.
- Remove pins: Carefully remove all pins once the snowflake is fully dry and rigid.
Method 2: Homemade Sugar Starch
This traditional method produces excellent results and uses pantry staples.
Recipe:
- 1/2 cup sugar
- 1/4 cup water
Combine in a small saucepan over medium heat. Stir continuously until the sugar is completely dissolved and the mixture is clear. Remove from heat and allow to cool slightly (it should be warm but not hot). Soak the snowflake in the solution, then pin and dry as described above.
Note: Sugar-stiffened snowflakes can attract insects in humid climates and may soften in high humidity. They’re best suited for dry, indoor environments.
Method 3: White Glue and Water
Mix equal parts white glue (like Elmer’s) and water. This produces a very stiff result — ideal for snowflakes that will be used as ornaments or window decorations where maximum rigidity is needed.
Method 4: Liquid Starch
Products like Sta-Flo liquid starch provide a lighter stiffening that’s perfect for snowflakes you want to have a slight flex. Use full-strength for stiffer results or dilute with water for a softer finish.
Blocking Tips for Perfect Symmetry
- Use a template: Print or draw a hexagonal guide on paper and place it under your plastic wrap. This gives you reference lines for pinning each point at equal intervals.
- Measure as you pin: Use a ruler to ensure each point is the same distance from the center.
- Pin generously: Don’t skimp on pins. Every picot, every chain loop, and every point should be individually pinned for the crispest results.
- Don’t rush drying: Removing the snowflake before it’s completely dry will result in curling and loss of shape.
12 Creative Ways to Use Crochet Snowflakes
Once you’ve built up a collection of beautiful snowflakes, the real fun begins — displaying them! Here are twelve inspiring ways to showcase your handmade creations:
1. Christmas Tree Ornaments
The most classic use. Thread a small ornament hook or a loop of metallic thread through one point, and hang on the tree. White snowflakes on a green tree create a stunning, timeless look. For extra sparkle, lightly spray with adhesive and dust with fine glitter.
2. Window Decorations
Attach snowflakes to windows using small suction cups with hooks, or suspend them from the curtain rod at varying heights with fishing line. When sunlight hits them, they cast beautiful shadow patterns on the walls.
3. Gift Toppers
Skip the stick-on bows and top your wrapped gifts with a crochet snowflake instead. The recipient gets two gifts in one! Attach with a small piece of double-sided tape or a dot of hot glue on the ribbon.
4. Garlands
String multiple snowflakes along a length of twine, ribbon, or fishing line to create a garland for mantels, doorways, or staircases. Alternate sizes and designs for visual interest. Space them 6 to 8 inches apart for the best effect.
5. Table Settings
Place a snowflake at each table setting as a place card holder — write the guest’s name on a small tag and attach it to the snowflake with a ribbon. After the meal, guests take their snowflake home as a party favor.
6. Framed Art
Mount a single large snowflake or a collection of smaller ones on dark fabric (navy, black, or deep red) and frame them in a shadow box. This creates a striking piece of wall art that can be displayed throughout the winter season.
7. Mobile
Create a snowflake mobile by hanging multiple snowflakes at different heights from a wooden dowel, embroidery hoop, or branch. This makes a gorgeous nursery decoration or a stunning centerpiece hung above a dining table.
8. Coasters and Trivets
Larger snowflakes made with heavier thread or yarn can serve as beautiful seasonal coasters. Stiffen them heavily for durability, and seal with a light coat of clear acrylic spray to protect against moisture.
9. Card Embellishments
Tiny snowflakes (made with size 20 thread) can be glued or stitched to handmade holiday cards for a three-dimensional, tactile element that sets your cards apart from the rest.
10. Jewelry
Small, heavily stiffened snowflakes make unique earrings, pendants, or brooches. Attach earring hooks or pin backs with jewelry findings, and seal with clear nail polish or resin for durability. These make extraordinary handmade gifts.
11. Snow Globe Effect in Mason Jars
Suspend a small snowflake inside a mason jar using fishing line taped to the inside of the lid. Add a battery-operated tea light or a sprig of evergreen for a charming winter vignette.
12. Dream Catchers
Mount a snowflake inside a small embroidery hoop or ring, and add hanging ribbons, beads, or feathers below. This creates a winter-themed dream catcher that’s both decorative and meaningful.
Beyond White: Exploring Color Variations
While white and ecru are the traditional choices for crochet snowflakes, there’s no rule that says you can’t experiment with color. Here are some color palettes and approaches to consider:
Classic Winter
White, ivory, silver metallic thread. This is the timeless look that never goes out of style. Perfect for traditional décor.
Ice Blue
Light blue, baby blue, pale aqua. These cool tones evoke frozen landscapes and pair beautifully with silver accents. Use variegated blue thread for a subtle, organic color variation.
Modern Metallics
Gold, silver, copper metallic thread (or yarn with metallic plies). These create glamorous, eye-catching snowflakes that work beautifully with contemporary holiday décor. Note: metallic threads can be slippery and harder to work with — go slowly and maintain firm tension.
Bold and Bright
Red, green, deep blue, purple. Brightly colored snowflakes make a playful, modern statement. They’re especially fun for children’s rooms or non-traditional holiday decorating. Try making a “rainbow” collection with one snowflake in each color of the spectrum.
Two-Tone
Start with one color in the center and switch to a contrasting or complementary color for the outer rounds. White center with blue tips, gold center with white tips, or red center with green edges are all striking combinations.
Variegated Thread
Variegated crochet thread creates unexpected, organic color patterns in snowflakes. Because the thread shifts color gradually, each snowflake comes out slightly different — no two are exactly alike, just like real snowflakes. Look for winter-themed colorways in brands like Lizbeth or Aunt Lydia’s.
Common Mistakes and Troubleshooting
Even experienced crocheters encounter challenges with snowflakes. Here are the most common issues and how to solve them:
Problem: Snowflake curls or cups instead of lying flat
Cause: Tension is too tight, or not enough stitches/chains in the outer rounds.
Solution: Try going up one hook size, or consciously loosen your tension. If the pattern allows, add an extra chain to the outer loops. Aggressive blocking can also resolve mild curling.
Problem: Snowflake is wavy or ruffled
Cause: Too many stitches in the outer rounds, or tension is too loose.
Solution: Go down one hook size, or tighten your tension. If you’re following a pattern and it’s still ruffling, try reducing one repeat or shortening the chain spaces slightly.
Problem: Points are uneven
Cause: Inconsistent stitch count or tension variation between sections.
Solution: Count your stitches religiously at the end of each section. If one point is clearly shorter or longer than the others, rip back to the problem area and redo it. Use stitch markers to mark the beginning of each repeat.
Problem: Visible join in each round
Cause: The slip stitch join creates a slight bump that can be noticeable.
Solution: Try an “invisible join” — cut the yarn, pull the tail through the last loop, and use a tapestry needle to simulate a stitch that matches the joining stitch. This creates a seamless, invisible join.
Problem: Ends keep poking out
Cause: Tail wasn’t woven in securely enough, or the thread is slippery.
Solution: Weave the tail through at least 1 inch of stitches, changing direction at least once. Apply a tiny dot of fabric glue or clear nail polish to the cut end to prevent it from working free.
Problem: Snowflake lost its stiffness over time
Cause: Exposure to humidity, or insufficient stiffener was used.
Solution: Re-stiffen the snowflake by soaking it in stiffener solution again and re-blocking. Use a stronger concentration the second time. Store snowflakes in a dry, sealed container when not on display.
How to Store Your Crochet Snowflakes Year After Year
With proper storage, your crochet snowflakes will last for decades, becoming more precious with each passing year.
Best Storage Practices
- Use acid-free tissue paper. Wrap each snowflake individually in acid-free tissue paper to prevent yellowing. Regular tissue paper contains acids that can discolor white cotton over time.
- Store flat, not stacked. If possible, store snowflakes in a single layer in a flat box. If you must stack, place tissue paper between each layer.
- Choose a rigid container. Use a sturdy box, hat box, or plastic storage container to prevent crushing. Avoid bags, which offer no structural protection.
- Include silica gel packets. Toss a few silica gel packets into the storage container to absorb moisture and prevent mildew.
- Keep in a cool, dry, dark location. Avoid attics (too hot), basements (too damp), or areas with direct sunlight (fading).
- Label the container. Include the year, the patterns used, and any other notes. Future you (or future generations) will appreciate the documentation.
Refreshing Stored Snowflakes
When you bring your snowflakes out of storage each year, they may need a little refreshing:
- Remove from tissue paper carefully.
- If they’ve softened, re-stiffen and re-block as described above.
- If they’ve yellowed slightly, soak in a solution of warm water and oxygen-based bleach (like OxiClean) for 30 minutes, then re-stiffen.
- If they’re dusty, use a soft brush or a hair dryer on a cool setting to remove dust.
Frequently Asked Questions
What size hook is best for crochet snowflakes?
For traditional snowflakes made with size 10 crochet thread, a 1.5mm to 1.75mm steel crochet hook is standard. If you’re using worsted weight yarn for larger, beginner-friendly snowflakes, use a 4.0mm to 5.0mm hook. Always check the specific pattern for the recommended hook size, but don’t be afraid to adjust up or down based on your personal tension.
Can I use acrylic yarn instead of cotton thread?
You can, but there are trade-offs. Acrylic doesn’t stiffen as well as cotton, so your snowflakes may not hold their shape as crisply. Acrylic also has a softer, fuzzier texture that doesn’t produce the same sharp, defined stitches. For ornamental snowflakes, cotton is strongly recommended. For garments or wearable accessories with snowflake motifs, acrylic is fine.
How do I make my snowflakes sparkle?
Several options: (1) Use metallic crochet thread or yarn with metallic plies. (2) After stiffening, lightly spray with adhesive and dust with ultra-fine glitter. (3) Soak in stiffener mixed with fine glitter. (4) Apply a thin line of dimensional fabric paint along the edges — it dries clear with a subtle sparkle.
How many snowflakes can I make from one ball of thread?
A standard 400-yard ball of size 10 crochet thread will yield approximately 20 to 30 medium-sized snowflakes (3–4 inches). Larger or more complex designs use more thread, while simpler patterns use less. As a general rule, budget 15 to 20 yards per snowflake.
Can I sell crochet snowflakes?
Yes! Crochet snowflakes sell well at craft fairs, holiday markets, and online through platforms like Etsy. Price them to reflect the cost of materials, the time invested, and the skill required. Most handmade crochet snowflakes sell for $5 to $15 each, with elaborate designs or sets commanding higher prices. If you’re using someone else’s pattern, check the designer’s copyright policy — many pattern designers allow the sale of finished items but require credit.
Are crochet snowflakes safe for young children?
Stiffened crochet snowflakes can have sharp, rigid points that may pose a minor poking hazard for very young children. They’re also not suitable as teething or chewing items. For children’s rooms, consider making snowflakes from soft, unstiffened yarn — they won’t hold their shape as crisply, but they’re safe and still charming. Alternatively, frame stiffened snowflakes behind glass, out of reach.
Start Your Snowflake Collection Today
There’s no better time to begin crocheting snowflakes than right now. Whether you’re an absolute beginner picking up a hook for the first time or a seasoned crocheter looking for a new seasonal project, snowflakes offer a perfect blend of simplicity and artistry, tradition and creativity.
Start with one of the beginner patterns above, master the basic techniques, and then let your imagination and skill carry you to the more complex designs. Before you know it, you’ll have a growing collection of handmade snowflakes — each one a tiny work of art, each one a reflection of your creativity and care.
And years from now, when you unwrap those snowflakes from their tissue paper and hang them once again, you’ll remember the evening you made them — the movie playing in the background, the cup of tea at your elbow, the quiet satisfaction of hook and thread creating something beautiful together.
That’s the magic of crochet snowflakes. They don’t just decorate your home — they become part of your story.
Happy crocheting, and happy winter!