How to Read a Crochet Pattern: A Complete Beginner’s Guide
Learn how to read a crochet pattern from scratch, including abbreviations, stitch counts, repeats, US and UK terms, gauge, and common beginner mistakes.
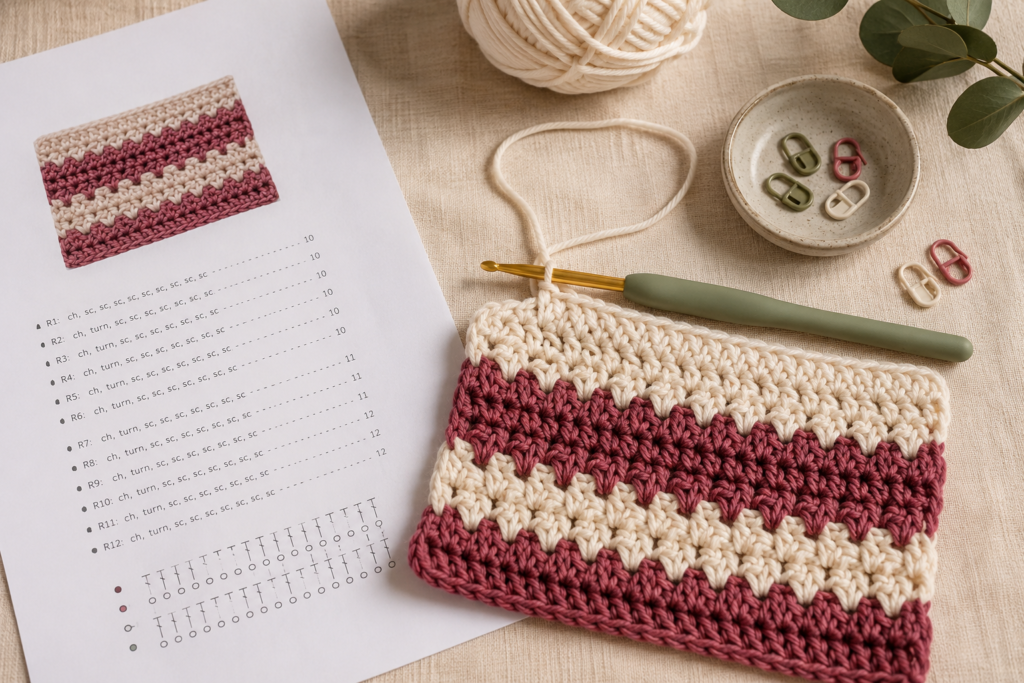
Crochet patterns can look like a completely foreign language the first time you encounter them. Ch 3, dc in next st, sk 2, sl st to join — what on earth does any of that mean?
Here is the truth that nobody tells beginners: crochet abbreviations are not complicated once you understand the system. Every single abbreviation follows a logical structure. Every notation mark serves a clear purpose. And once you have the key, the whole language unlocks instantly.
This guide will walk you through everything you need to decode any crochet pattern with complete confidence — from the materials list at the top all the way through to the finishing instructions at the bottom. By the end, you will be able to pick up any pattern and know exactly what it is asking you to do.
📖 What You Will Learn in This Guide
Why Learning to Read Patterns Matters
Some people look at a crochet pattern and feel immediately intimidated. The symbols, the abbreviations, the stitch counts in parentheses — it can look like an engineer’s blueprint rather than a crafting guide.
But here is what reading patterns actually unlocks for you:
Unlimited Projects
Access to millions of free and paid patterns worldwide — any item you have ever seen crocheted, you can now make yourself.
Creative Freedom
Once you understand patterns, you can modify them — change sizes, swap colors, adjust stitch counts to fit your vision.
Deeper Appreciation
You will understand exactly what goes into handmade pieces — and why skilled handmade work carries the value it does.
Write Your Own
Reading patterns fluently is the first step toward writing your own — eventually designing pieces from scratch.
The Anatomy of a Crochet Pattern
Every well-written crochet pattern follows the same basic structure. Understanding what each section is for — before you look at a single abbreviation — makes the whole document far less intimidating.
Materials List
The materials list tells you everything you need to gather before you begin. A complete materials list will include:
Yarn: The specific type, weight, and amount required — usually listed in yards or grams, and sometimes both. If the pattern calls for a specific brand, you can substitute another yarn of the same weight and fiber type.
Hook Size: Listed in millimeters. This is the recommended size to achieve the correct gauge — but you may need to adjust based on your personal tension.
Notions: Any additional tools needed — scissors, yarn needle for weaving in ends, stitch markers, buttons, zippers, or any other materials.
Gauge
Gauge tells you how many stitches and rows should fit within a specific measurement — usually a 4 inch by 4 inch square. A typical gauge note looks like this:
If your swatch has more stitches than the pattern specifies in 4 inches, your tension is too tight and you need a larger hook. If it has fewer stitches, your tension is too loose and you need a smaller hook.
Special Stitches
If the pattern uses any stitch that goes beyond the standard abbreviations — a cluster, a shell, a popcorn, a bobble, or a custom combination stitch — it will be explained in full detail here before the pattern instructions begin.
This section is critical. Always read it before you begin crocheting. If you skip it and encounter the special stitch mid-pattern, you will not know what to do when you get there.
Size Information
For garments, patterns typically come in multiple sizes. The sizes are usually listed at the top of the pattern in a format like this:
Before you begin, circle or highlight your size throughout the entire pattern so you never accidentally follow the wrong number.
Pattern Instructions
This is the main body of the pattern — the actual row-by-row or round-by-round instructions. It will be written in one of two formats:
Written Format: The most common format in English-language patterns. Abbreviations are listed in sequence with punctuation guiding the repetition.
Chart Format: A visual diagram using internationally standardised symbols to represent each stitch. Especially common in Japanese and European patterns, and extremely useful for visualising lace or colourwork designs.
The Master List of Crochet Abbreviations
This is your decoder ring. Every abbreviation in every pattern comes from this master list. Learn these and pattern-reading becomes effortless.
Foundation & Basic Stitches
| Abbreviation | Full Name | What It Does | Difficulty |
|---|---|---|---|
| ch | Chain | The foundation of most crochet. A series of interlocking loops. | ⭐ Beginner |
| sl st | Slip Stitch | The shortest stitch. Used for joining rounds and moving yarn without adding height. | ⭐ Beginner |
| sc | Single Crochet | Short and tight stitch. Creates a dense, sturdy fabric. | ⭐ Beginner |
| hdc | Half Double Crochet | Sits between sc and dc in height. Creates a slightly stretchy fabric. | ⭐ Beginner |
| dc | Double Crochet | The most versatile and widely used stitch in crochet. | ⭐ Beginner |
| tr | Treble (Triple) Crochet | A tall, open stitch. Commonly used in lace and openwork patterns. | ⭐⭐ Intermediate |
| dtr | Double Treble Crochet | Very tall stitch used in advanced lacework and decorative stitch patterns. | ⭐⭐ Intermediate |
| trtr | Triple Treble Crochet | An extremely tall stitch used in highly decorative and advanced patterns. | ⭐⭐⭐ Advanced |
Construction & Instruction Words
| Abbreviation | Meaning | How It Is Used |
|---|---|---|
| st | Stitch | Refers to a single stitch position in the fabric |
| sts | Stitches | Plural — refers to multiple stitch positions |
| sp | Space | The gap or opening created by a chain space or skipped stitch |
| ch-sp | Chain Space | The space created beneath a chain — you crochet into this space, not the chain itself |
| beg | Beginning | Refers to the start of a row or round |
| rem | Remaining | The stitches left over after working the specified number |
| rep | Repeat | Tells you to work the same sequence again |
| rnd | Round | One complete circuit of stitches worked in the round |
| RS | Right Side | The public-facing side of the finished fabric |
| WS | Wrong Side | The back side of the finished fabric — facing inward when worn |
| yo | Yarn Over | The action of wrapping the working yarn over your hook |
| sk | Skip | Move past the next stitch without working into it |
| pm | Place Marker | Insert a stitch marker at this point in the work |
| sm | Slip Marker | Move the stitch marker from one needle or position to the next |
| t-ch | Turning Chain | The chain stitches worked at the start of a row to bring the yarn to the correct height |
Increases & Decreases
| Abbreviation | Meaning | Effect on Stitch Count |
|---|---|---|
| inc | Increase | Work 2 stitches into the same stitch — adds 1 stitch to your count |
| dec | Decrease | Work 2 stitches together as one — removes 1 stitch from your count |
| sc2tog | Single Crochet 2 Together | The standard decrease in single crochet — reduces 2 stitches to 1 |
| dc2tog | Double Crochet 2 Together | The standard decrease in double crochet — reduces 2 stitches to 1 |
| inv dec | Invisible Decrease | A decrease method that is virtually invisible on the right side — used in amigurumi |
Loop & Post Placement Instructions
| Abbreviation | Meaning | What It Creates |
|---|---|---|
| BLO | Back Loop Only | Working into only the back loop creates a visible ridge on the opposite side |
| FLO | Front Loop Only | Working into only the front loop creates a visible ridge on the back |
| FP | Front Post | Hook goes around the post (vertical bar) of the stitch from the front |
| BP | Back Post | Hook goes around the post (vertical bar) of the stitch from the back |
| FPdc | Front Post Double Crochet | Creates a raised, textured stitch on the right side — used in ribbing |
| BPdc | Back Post Double Crochet | Creates a recessed stitch — alternated with FPdc to create ribbing texture |
How to Understand Pattern Notation
Abbreviations tell you what to do. Notation marks tell you where, how many times, and in what order to do it. These punctuation marks are just as important as the abbreviations themselves.
Parentheses
At the end of a row: Shows your stitch count. Always count your stitches and make sure they match.
In the middle of a row: Groups stitches worked into the same stitch or space.
sc in each st across. (20)
(dc, ch 1, dc) in next ch-sp
Brackets
Brackets group a set of stitches that are to be repeated as a unit. Everything inside the brackets is worked together as one repeating sequence.
[sc, dc] across row
This means: work sc then dc, then sc then dc, repeating all the way across the row.
Asterisks
Asterisks mark the beginning and sometimes the end of a repeating section. Everything between (or after) the asterisks is repeated.
*sc in next 3 sts, dc in next st; rep from * to end
Repeat the sequence of 3 sc then 1 dc all the way to the end of the row.
Dagger Symbol
Less common but used in some patterns as an alternative repeat marker — similar to the asterisk. It marks where a repeat begins so you can return to that point.
†dc in next 2 sts, ch 1, sk 1; rep from † 5 times
Work the sequence marked by the dagger a total of 5 times.
Curly Braces
Used in some patterns to indicate a group of stitches worked as a unit — especially in colourwork patterns where multiple colours are indicated within the same section.
{3 sc in Color A, 2 sc in Color B}
Times Symbol
Tells you exactly how many times to repeat a stitch or sequence. Straightforward and unambiguous.
dc 3× in next st
Work 3 double crochet stitches all into the same stitch — creating an increase.
Putting It All Together: Reading a Full Pattern Row
Let us take a realistic pattern row and break down every single element:
How to Follow a Pattern Step by Step
Reading a pattern and successfully following one are slightly different skills. Here is the exact process we recommend for every project — beginner or not.
Your Pattern-Following Process
Read the Entire Pattern Before You Start
Never skip this step. Read from the materials list all the way to the finishing instructions. You need to know if there are special stitches, if pieces need to be worked separately, or if there is a construction technique that will require preparation. Surprises mid-project lead to mistakes.
Make a Gauge Swatch
Work a square of at least 6 inches using the pattern stitch. Measure the centre 4 inches and compare your stitch and row count to the pattern gauge. Adjust your hook size as needed — up for fewer stitches per inch, down for more.
Highlight Your Size
If the pattern comes in multiple sizes, go through the entire pattern before you begin and highlight, circle, or bold every number that corresponds to your size. This prevents the common mistake of following the wrong size mid-pattern.
Gather All Materials First
Have every item on the materials list ready before you begin. Your hook, all yarn quantities, stitch markers, scissors, and yarn needle. Running out of yarn or discovering you are missing a tool mid-project breaks your flow and concentration.
Place Stitch Markers Strategically
Before beginning any row or round with increases, decreases, or colour changes, place stitch markers at those points. It is far easier to count to a marker than to recount your entire work every time you need to find a specific stitch.
Count Your Stitches After Every Row
Especially in the early stages of a project. An extra or missing stitch that you catch after 2 rows takes 2 minutes to fix. The same error discovered after 20 rows means frogging your entire afternoon’s work.
Track Your Place in the Pattern
Use a sticky note on a printed pattern to mark your current row. Use a digital app with a built-in row counter if working from a screen. Never rely on memory — even experienced crocheters lose their place.
Take Breaks and Crochet in Good Light
Tired eyes miss stitch placements. Tired hands lose consistent tension. Always crochet in bright, clear light — natural daylight is ideal. Take breaks when your hands or eyes feel strained. The pattern will wait.
The US vs UK Terms Problem — And How to Spot It
This is the most dangerous trap in all of crochet pattern reading — and it catches even experienced makers off guard. US and UK crochet terminology use the same words to mean completely different things.
A US “single crochet” and a UK “single crochet” are not the same stitch. What the US calls a double crochet, the UK calls a treble. If you follow a UK pattern thinking it uses US terms, your entire piece will be the wrong size and texture.
Here is the complete conversion chart:
| 🇺🇸 US Term | 🇬🇧 UK Term | Notes |
|---|---|---|
| Slip Stitch (sl st) | Slip Stitch (sl st) | The only stitch that is the same in both systems |
| Single Crochet (sc) | Double Crochet (dc) | One of the most confusing — US sc = UK dc |
| Half Double Crochet (hdc) | Half Treble Crochet (htr) | Different name, same stitch construction |
| Double Crochet (dc) | Treble Crochet (tr) | The most commonly used stitch — named differently in each system |
| Treble Crochet (tr) | Double Treble (dtr) | Tall stitch — one yarn-over higher than dc/tr |
| Double Treble (dtr) | Triple Treble (trtr) | Very tall stitch used in advanced lacework |
How to Identify Which System a Pattern Uses
Most well-written patterns will state at the top whether they use US or UK terminology. If they do not, check the country of origin — US-based designers almost always use US terms. UK, Australian, and New Zealand designers typically use UK terms. If you are still unsure, look for “sc” — if the pattern uses that abbreviation, it is almost certainly US terms.
Common Beginner Mistakes When Reading Patterns
Every beginner makes these mistakes. Knowing them in advance means you can avoid them — or at least recognise them quickly when they happen.
Skipping the Gauge Swatch
Why it happens: It feels like wasted time when you are excited to start a project.
Ignoring Stitch Counts at Row Ends
Why it happens: It feels slow to count every stitch at the end of every row.
Confusing US and UK Terms
Why it happens: Most people do not know the two systems exist until they are already confused mid-project.
Not Reading Special Stitches Before Starting
Why it happens: Beginners often jump straight to the pattern instructions without reading the setup sections.
Losing Your Place and Guessing
Why it happens: Life interrupts. You put the project down mid-row and cannot remember exactly where you were when you pick it back up.
Crocheting Into the Turning Chain When You Should Not
Why it happens: The turning chain can look like a regular stitch and it is not always obvious whether to count it as one.
Recommended Tools for Pattern Reading
The right tools make following a pattern dramatically easier. Here are the ones we genuinely use and recommend:
Stitch Markers
Get at least 20 locking stitch markers. You will use more than you think — for marking increases, colour changes, the beginning of rounds, and any point you want to return to.
Row Counter App
Apps like Crochet Brain or Knit Companion track your row count automatically and let you annotate patterns digitally. Free and worth every second of setup time.
Gauge Ruler or Swatch Tool
A rigid ruler with a cut-out 4 inch window makes measuring swatches faster and more accurate than a tape measure alone.
Highlighters
For printed patterns — use one colour to highlight your size and another to mark rows as you complete them. Simple and highly effective.
Yarn Needle Set
Multiple sizes of blunt-tipped yarn needles for weaving in ends on different yarn weights. Never use a sharp needle on yarn — it splits the plies.
A Good Light Source
A daylight LED lamp is the best investment a crocheter can make. It illuminates dark yarn, reduces eye strain, and lets you see stitch placement clearly at any time of day.
Online Resources We Recommend
Where to Find Quality Patterns
Ravelry.com — The world’s largest crochet and knitting database with millions of free and paid patterns, filterable by difficulty, yarn weight, stitch type, and more.
Lovecrafts.com — A well-organised marketplace for patterns with excellent beginner filters and helpful reviews from other makers.
YouTube — For any stitch or technique you do not understand, there is almost certainly a slow, clear video tutorial available. Search the stitch name plus “tutorial” and watch it before attempting it in your project.
Pinterest — Excellent for discovering patterns and linking to free resources, though always follow the link to the original source to get the full instructions.
Understanding Patterns Makes You a Better Shopper Too
Here is something that surprises people: understanding how crochet patterns work makes you a significantly more informed customer when shopping for handmade pieces.
When you know what goes into executing a complex stitch pattern — the counting, the tension control, the colour management, the shaping, the finishing — you understand immediately why skilled handmade work carries the price it does.
A single Crochelly sweater might represent 15 to 20 hours of skilled, concentrated work. The pattern must be followed precisely. The tension must be consistent. Every end must be secured. Every seam must be invisible. Every piece must be blocked to correct dimensions.
That is not just making something. That is craftsmanship. And now you know exactly what that word means in practice.
Feeling Inspired to Try Crochet?
We love supporting the crochet community in every way. Whether you create your own pieces or invest in ours — the craft is the thing.